Coxinha

The first of this week’s guest posts (while I’m on vacation) is from my friend Jani, who we’ve seen several times before on the blog. I quite approve of Jani’s writing style! I also like that she picked a food I’d never heard of before!

Corinne and I go way back, and have enjoyed cooking or baking together for quite a
while now. I’ve made cameo appearances in a couple of posts, but this is my first guest
entry – how exciting!

I was trying to decide what recipe would be worthy of such an honor, and decided on
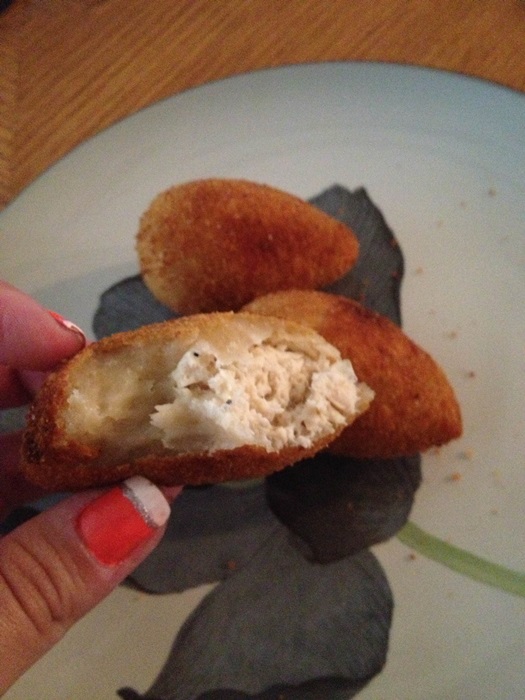
one of my favorite (but incredibly high maintenance) snacks! Coxinha (pronounced koesheen-yah) is a Brazilian snack food found at most grab-and-eat type counters. They look like little chicken legs and are a perfect mix of fried, doughy deliciousness. Now, buckle up. These little snackaroos take about 2 hours to make, but the recipe yields a TON and they are just as good cooked after being frozen as they are brand new.

Ingredients:

  • 3 boneless chicken breast
  • 1/2 chopped onion
  • 2 chopped cloves of garlic
  • 6 tablespoon margarine
  • 2 cubes beef bouillon
  • salt
  • ground pepper
  • 3 cups all-purpose flour
  • 8 ounces cream cheese
  • 2 eggs
  • bread crumbs
  • oil for frying

The recipe calls for putting bouillon, chicken, onions, garlic, margarine, salt and pepper in a pressure cooker. If you don’t have one, you can get the same results by chopping the chicken into 2-inch cubes and cooking the ingredients on the stovetop for about a half hour. When the chicken is cooked through, you’re ready for the next step.

photoNext, separate the chicken/onions/garlic from the broth. DO NOT POUR THE BROTH DOWN THE DRAIN! You will need it later on in the recipe. I put a strainer into a bowl and carefully separate the chunky stuff from the liquid. You can reuse the pot you just emptied, just make sure you get all of the onions and pieces out before you transfer the broth back into it. Measure out 3 cups of the broth and set it aside – it’s time to mix up the chicken stuffing.
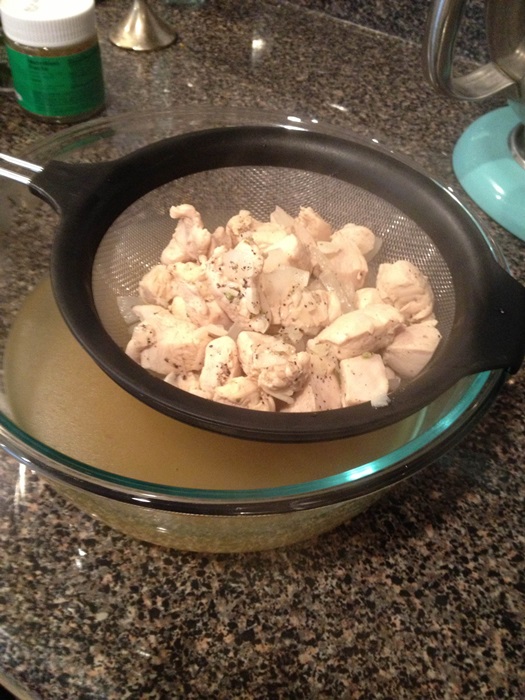
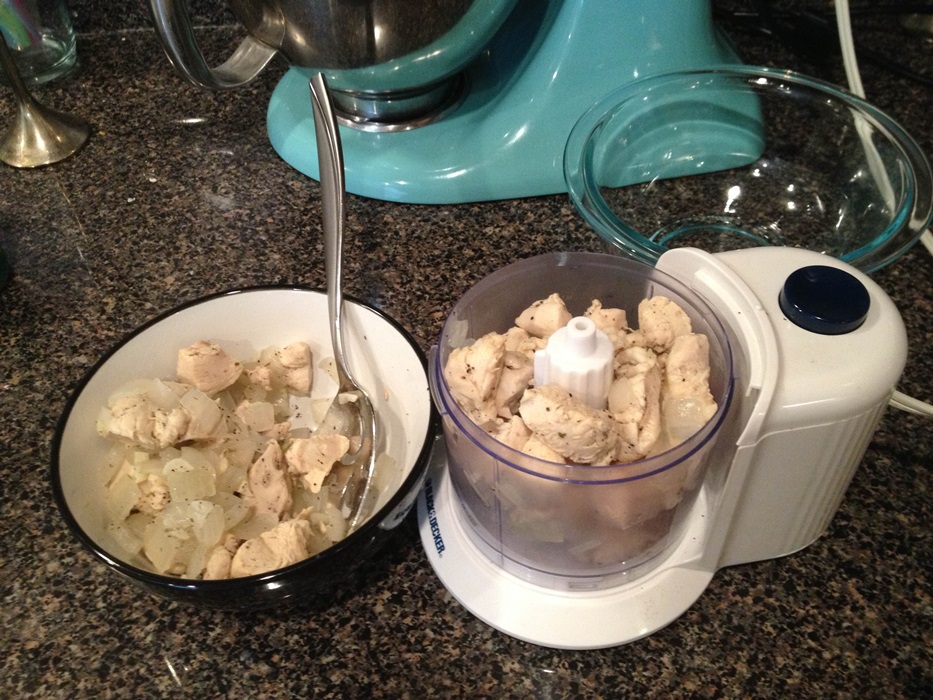
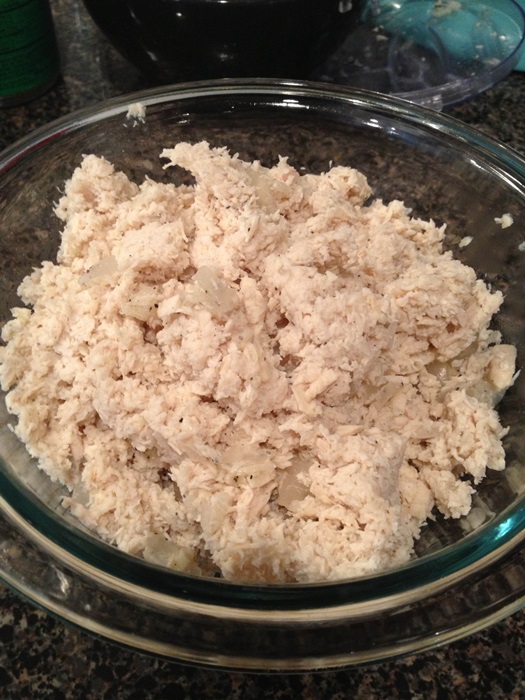
photo_1 photo_2Depending on the texture of chicken you prefer, you can finely chop up the meat or use a
fork to pull it apart. I’ve always used my teeny but trusty food processor – this way, the
onions, garlic and chicken all blend in together and will look sort of like tuna from a can
after it has been smooshed with a fork.

photo_3photo (2)I take a little detour from the original recipe at this point. Rather than waiting to add the
cream cheese, I have found the stuffing tastes better when it is folded into the chopped/pulled/tuna-like chicken.

photo_1 (2)To make the dough, bring the 3 cups of broth back up to a boil. Again, I detoured from
the recipe. Instead of mixing the 3 cups of flour into the pot and vigorously stirring the
mixture, I pre-measured the flour into my Kitchen Aid mixer armed with the dough
attachment. Once the broth boils, pour it slowly into the mixer while it is running on a
low setting, and turn up the power once all of the broth is poured in. BE CAREFUL –
don’t forget, the broth just came off of the stove. No touchy. Once the dough looks well
mixed, let it sit for a couple of minutes to cool down. It should be very sticky when you
touch it, but easy to make into a squishy ball if you lightly mold it.
photo_2 (2)You’re about half way done. Can you see why these are only a special treat? For this next
step, you’ll need cooking spray, a rolling pin and a cookie sheet lined with parchment
paper.

Spray your countertop with cooking spray and separate the dough into a workable amount, depending on the amount of space you have. Roll out the dough until it is between 1/4 and a 1/2 inch thick (too little, and the stuffing could fall out, but too much and they’ll be…well…doughy). Cut circles out of the dough depending on the size you want your coxinha to be. If you make your circles about 4 inches in diameter, place a tablespoon of the chicken stuffing into the center and smoosh the edges up and around the filling. Keep rolling it in your hand until you make it look like a little chicken drumstick and place it on the parchment lined cookie sheet.

photo_3 (2)photo (3)photo_1 (3)photo_2 (3)Repeat. Repeat. Repeat. Repeat. I ended up with a total of 27 coxinha. If you have extra
filling, I suggest you make yourself a little ‘chicken melt’ sandwich. I’m sure you’ve worked up an appetite by now.

Two more steps. I promise they’re worth it.

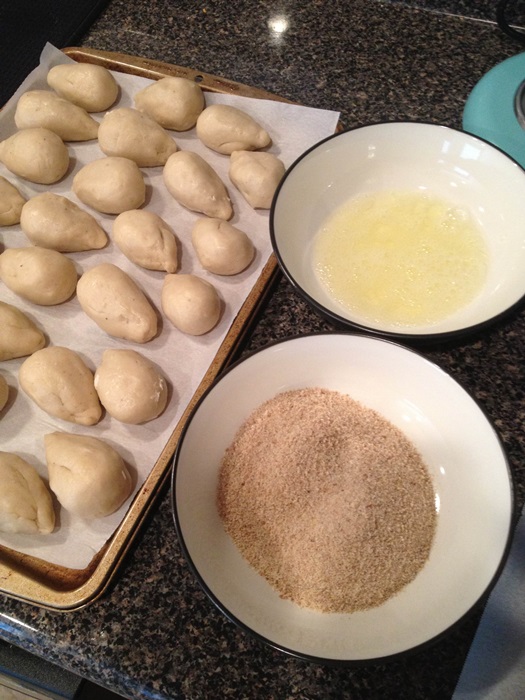
Separate 2 eggs, saving the whites in a bowl. In a second bowl, pour in some plain breadcrumbs. Dip each of the coxinha into the egg whites, then bread crumbs, coating
evenly and shaking off the extra crumbs.

photo_4photo_5If you’re planning on eating them all right away, you’re ready to fry them in vegetable
oil. If not, you can freeze the coxinha and fry them up when frozen – just give them a few
extra minutes. The coxinha should be golden brown on the outside when finished (about 4 minutes if they are room-temp ones, and about 6 minutes if frozen).

photo_6CHOW TIME – FINALLY! This crispy, crunchy, doughy, chicken-y goodness is a hit as
a party appetizer or a “its not meal o’clock” snack. Any condiments will do, but I prefer them with a spicy sauce.

photo_7 photo_8Thanks for having me on Spare Cake! I hope you enjoy this little taste of Brazil!

Coxinha

Lightly adapted from CookBrazil.com.

  • 3 boneless chicken breasts chopped into 2 inch cubes
  • 1/2 chopped onion
  • 2 chopped cloves of garlic
  • 6 tablespoon margarine
  • 2 cubes beef bouillon
  • salt
  • ground pepper
  • 3 cups all-purpose flour
  • 8 ounces cream cheese
  • 2 eggs
  • bread crumbs
  • oil for frying

Combine bouillon, chicken, onions, garlic, margarine, salt and pepper in a saucepan and cook on the stovetop for about a half hour, until chicken is cooked through.

Next, strain the chicken/onions/garlic from the broth, saving both parts. Measure out 3 cups of the broth and set it aside – it’s time to mix up the chicken stuffing.
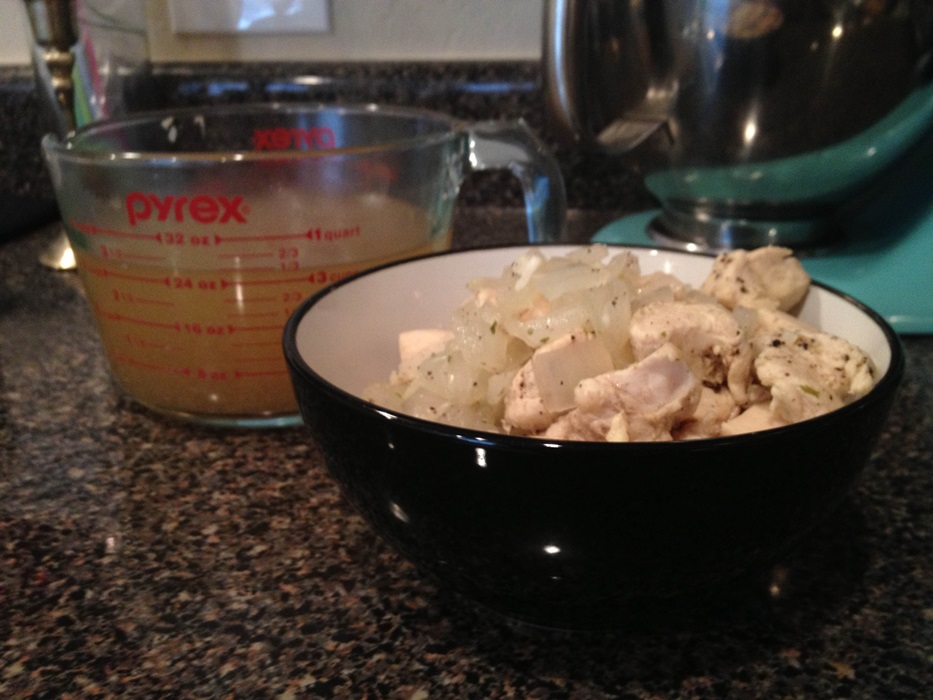
Depending on the texture of chicken you prefer, you can finely chop up the meat, pull apart with a fork, or process in a food processor with the strained veggies. Fold in the cream cheese.

To make the dough, bring the 3 cups of broth back up to a boil. Place the flour into a mixer fitted with the dough hook, and slowly pour the boiling broth into the mixer while it is running on a low setting. Turn up the power once all of the broth is poured in. Once the dough looks well mixed, let it sit for a couple of minutes to cool down. It should be very sticky when you touch it, but easy to make into a squishy ball if you lightly mold it.

Set out cooking spray, a rolling pin and a cookie sheet lined with parchment paper. Spray your countertop with cooking spray and separate the dough into a workable amount, depending on the amount of space you have. Roll out the dough until it is between 1/4 and a 1/2 inch thick. Cut circles out of the dough depending on the size you want your coxinha to be. If you make your circles about 4 inches in diameter, place a tablespoon of the chicken stuffing into the center and smoosh the edges up and around the filling. Keep rolling it in your hand until you make it look like a little chicken drumstick and place it on the parchment lined cookie sheet. Repeat to use up remaining dough and filling.
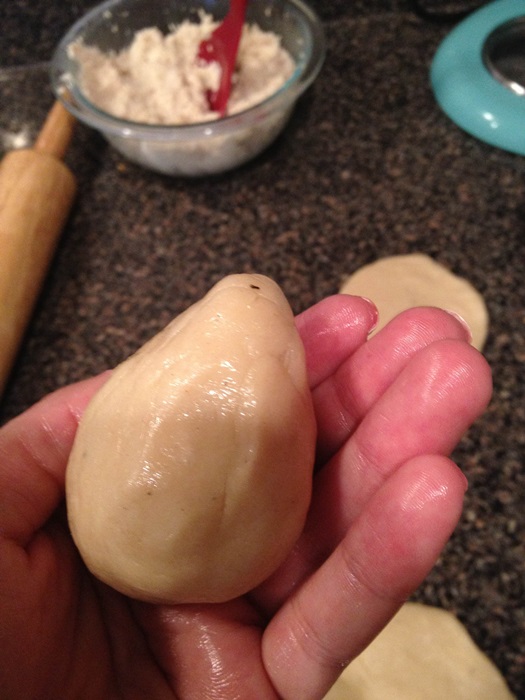
Separate 2 eggs, saving the whites in a bowl. In a second bowl, pour in some plain breadcrumbs. Dip each of the coxinha into the egg whites, then bread crumbs, coating evenly and shaking off the extra crumbs.
If you’re planning on eating them all right away, you’re ready to fry them in vegetable oil. If not, you can freeze the coxinha and fry them up when frozen – just give them a few extra minutes. The coxinha should be golden brown on the outside when finished (about 4 minutes if they are room-temp ones, and about 6 minutes if frozen).

Posted in Dinner, Lunch, Snack | Tagged , , | 1 Comment

Peanut Butter Crunch Eclair Bars

First off, a note that I’m leaving (will have left by the time this is posted) for vacation in Spain with my mother, so next week there will be guest posts from several of my friends. Thanks in advance, friends!

And now! A hefty pan full of delicious! I’m into it! I accidentally made this in a 9X13″ pan, not a big jelly roll, so it’s thicker than it otherwise would be, but I feel like the pudding layer might be kind of thin if spread out over the wider pan?

IMG_6935Ingredients:

  • 1 cup sugar
  • 1 cup light corn syrup
  • 2 cups creamy peanut butter
  • 8 cups Frosted Flakes cereal
  • 1 1/4 cup butter, divided
  • 4 cups powdered sugar
  • 2 3.4 ounce packets of instant vanilla pudding
  • 1/4 cup milk
  • 2 cups semi-sweet chocolate chips

Line a 9×13″ or 15X10″ pan with foil and spray with cooking spray. We’ve still got that parchment/foil wrap, that I like a lot. Put the Frosted Flakes in a large bowl and set aside.

Combine the corn syrup and sugar in a medium saucepan over medium heat. Bring to a boil, and boil 1 minute, stirring occasionally.

IMG_6922Remove from the heat and stir in the peanut butter until evenly combined.

Starts off kind of gross and stringy looking, but eventually smooths out.

Starts off kind of gross and stringy looking, but eventually smooths out.

Stir the peanut butter mixture into the Frosted Flakes until coated, then turn out into the lined pan, spread evenly, and set aside. This is actually really super delicious as is, at this step. I ate more than I should have before moving on to the next step.

IMG_6924In a large saucepan, melt 3/4 cup of the butter over medium-low heat. Add the powdered sugar and pudding mix and. Whisk together, then gradually add the milk. I found that 1/4 cup milk left it too thick to spread well, so added another 1/4 cup and got a good texture.

milkSpread over the the cereal crust.

IMG_6927In a medium saucepan, melt the remaining 1/2 cup butter and the chocolate chips over low heat. Spread the melted mixture over the pudding layer.

IMG_6928Chill for at least one hour, then cut into bars.

IMG_6933

Peanut Butter Crunch Eclair Bars

From Cookies and Cups.

  • 1 cup sugar
  • 1 cup light corn syrup
  • 2 cups creamy peanut butter
  • 8 cups Frosted Flakes cereal
  • 1 1/4 cup butter, divided
  • 4 cups powdered sugar
  • 2 3.4 ounce packets of instant vanilla pudding
  • 1/4 – 1/2 cup milk
  • 2 cups semi-sweet chocolate chips

Line a 9×13″ or 15X10″ pan with foil and spray with cooking spray. Put the Frosted Flakes in a large bowl and set aside.

Combine the corn syrup and sugar in a medium saucepan over medium heat. Bring to a boil, and boil 1 minute, stirring occasionally. Remove from the heat and stir in the peanut butter until evenly combined.

Stir the peanut butter mixture into the Frosted Flakes until coated, then turn out into the lined pan, spread evenly, and set aside.

In a large saucepan, melt 3/4 cup of the butter over medium-low heat. Add the powdered sugar and pudding mix and. Whisk together, then gradually add the milk. Spread over the the cereal crust.

In a medium saucepan, melt the remaining 1/2 cup butter and the chocolate chips over low heat. Spread the melted mixture over the pudding layer.

Chill for at least one hour, then cut into bars.

Posted in Dessert | Tagged , , , | Leave a comment

Cheesy Kimchi Butter-Ranch Bread

So this is a recipe that sounds potentially gross, or at least highly smelly, but turns out to be really tasty. It comes out tasting somewhere between garlic bread, French bread pizza, and Korean food, which turns out to be a fine place to be.

IMG_6944Ingredients:

  • 4 tablespoons unsalted butter, room temperature
  • 4 tablespoons salted butter, room temperature
  • 1/2 cup kimchi
  • 2 teaspoons fish sauce
  • 1 teaspoon minced garlic
  • 1 loaf French or Italian bread, split in half lengthwise
  • 1 cup ranch dressing
  • 2 cups Italian shredded cheese mix
  • 1/8 cup fresh minced chives

Preheat your oven’s broiler and line a baking sheet with foil.

Combine the butters, kimchi, fish sauce, and garlic in a food processor. Don’t add too much of the liquid from the kimchi – some is fine, but a ton will make your bread soggy. Pulse until the ingredients are combined, scraping the sides at least once. For some reason, at this stage it really looked like there was quinoa in there, but…nope!

IMG_6938Turn the mixture out into a nonstick skillet and heat over low heat until the butter melts and the mixture is smoother.

Sometimes Jenn and I take 5 hours to eat at a Korean restaurant. Pretty ideal evening, really.

Sometimes Jenn and I take 5 hours to eat at a Korean restaurant. Pretty ideal evening, really.

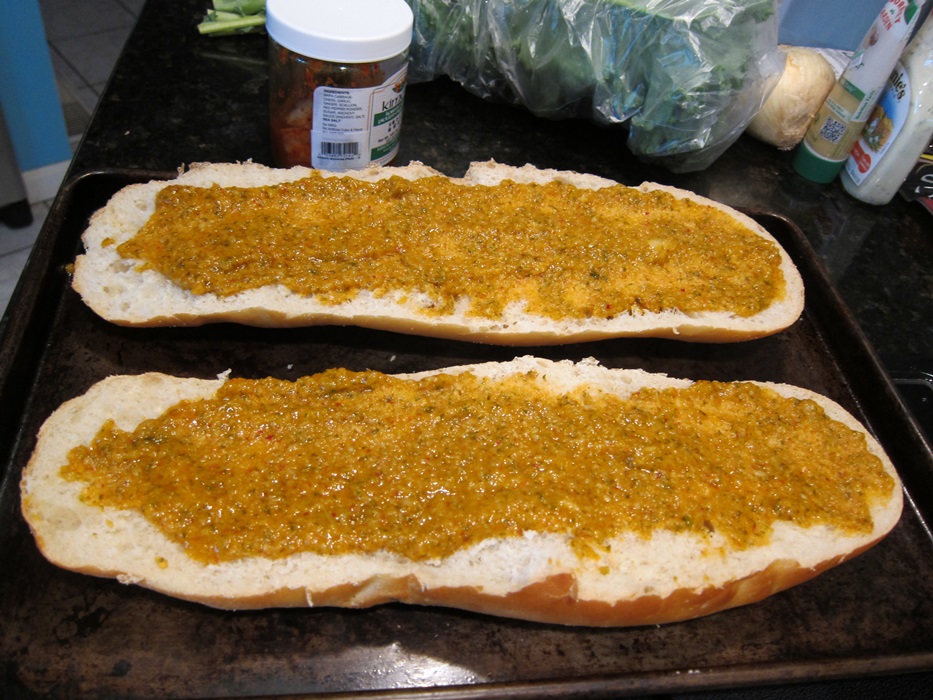
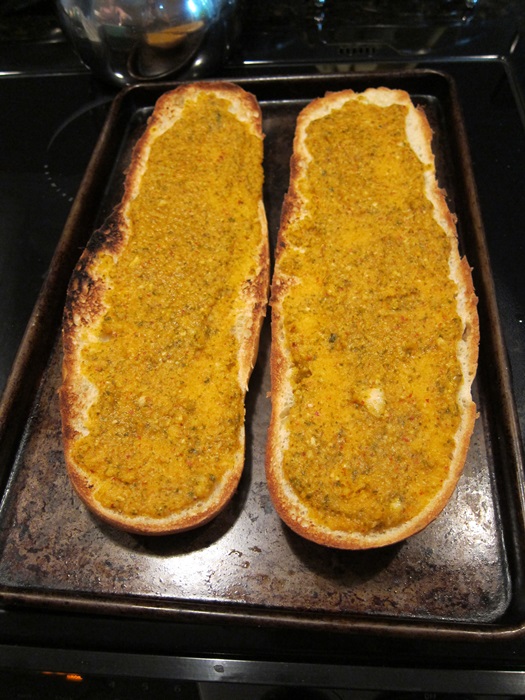
Spread over the bread (cut sides up), then broil 2-3 minutes.

IMG_6940Remove from the oven and turn the oven to bake, at 350 degrees.

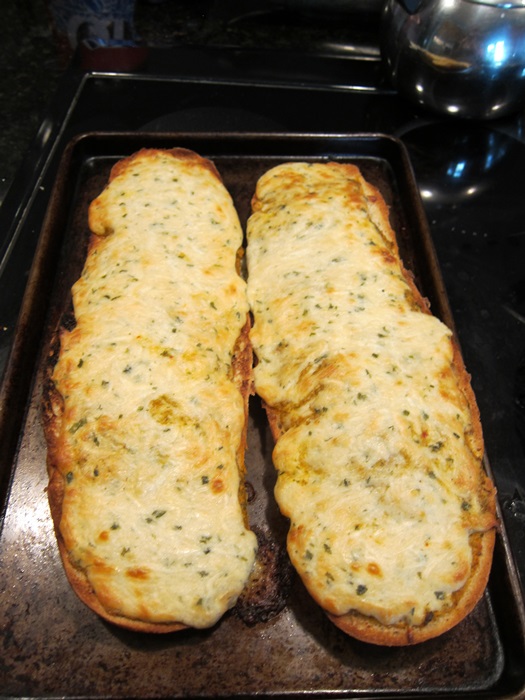
IMG_6941Combine the ranch dressing and cheese, and spread over the bread.

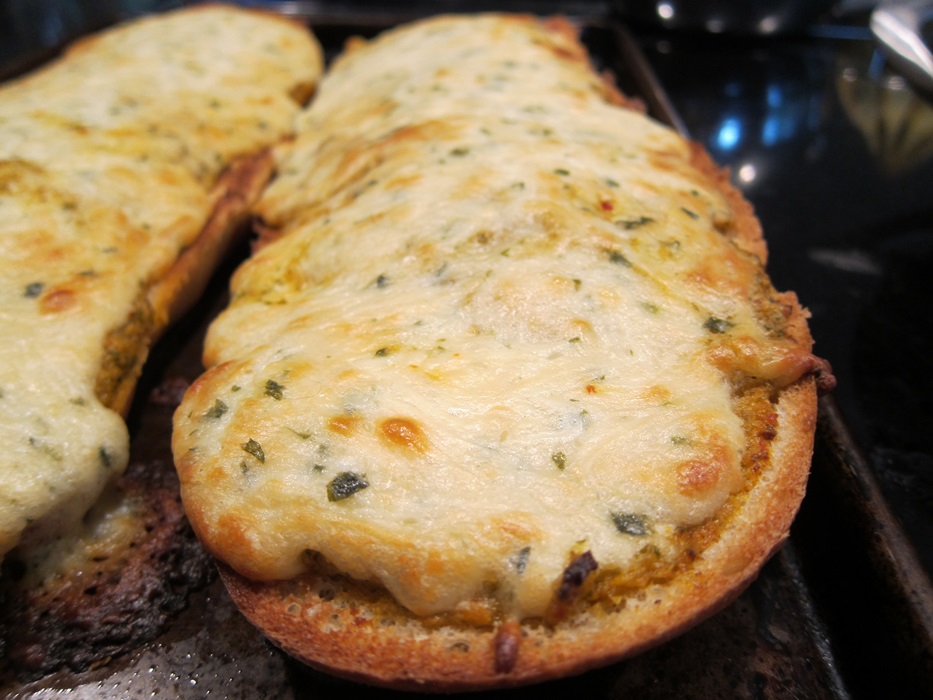
IMG_6943Bake for 20 minutes in the top 1/3 of the oven, until brown and bubbly.

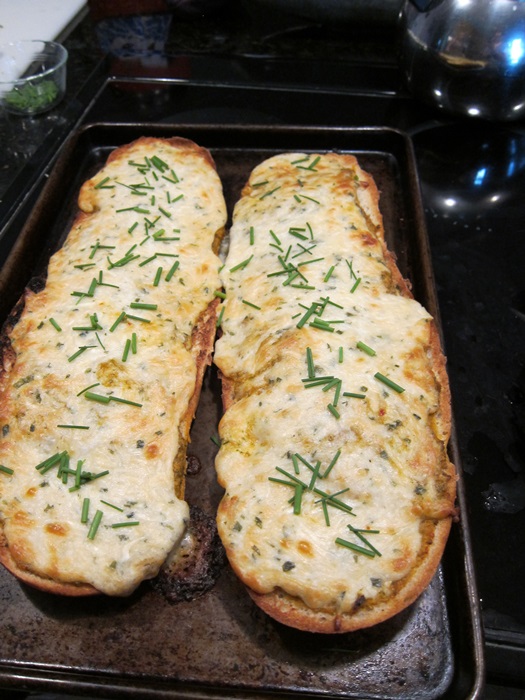
IMG_6945Remove from the oven and sprinkle with chives before serving.

The chives are from the yard!

The chives are from the yard!

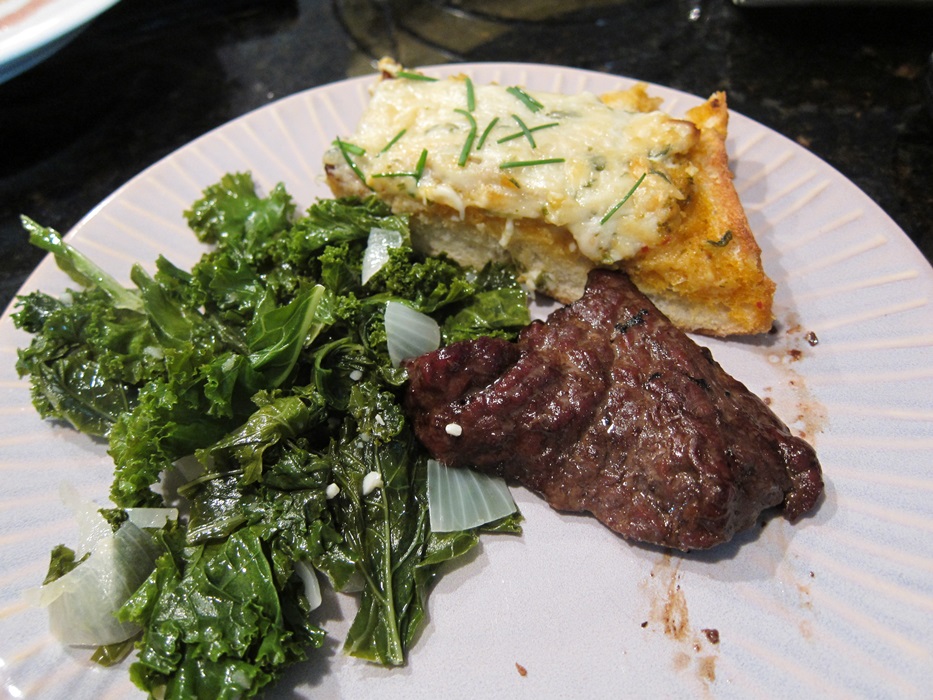
My friend Jenn and I both really enjoyed it! And happily, when it came out of the oven neither the kimchi nor the fish sauce odors were noticeable. Whew!

Yes. Good.

Yes. Good.

I’ll be submitting this to yeastspotting!

Cheesy Kimchi Butter-Ranch Bread

From Noble Pig.

  • 4 tablespoons unsalted butter, room temperature
  • 4 tablespoons salted butter, room temperature
  • 1/2 cup kimchi
  • 2 teaspoons fish sauce
  • 1 teaspoon minced garlic
  • 1 loaf French or Italian bread, split in half lengthwise
  • 1 cup ranch dressing
  • 2 cups Italian shredded cheese mix
  • 1/8 cup fresh minced chives

Preheat your oven’s broiler and line a baking sheet with foil.

Combine the butters, kimchi, fish sauce, and garlic in a food processor. Pulse until the ingredients are combined, scraping the sides at least once.

Turn the mixture out into a nonstick skillet and heat over low heat until the butter melts and the mixture is smoother. Spread over the bread, then broil 2-3 minutes. Remove from the oven and turn the oven to bake, at 350 degrees.

Combine the ranch dressing and cheese, and spread over the bread. Bake for 20 minutes in the top 1/3 of the oven, until brown and bubbly. Remove from the oven and sprinkle with chives before serving.

Posted in Dinner | Tagged , , | Leave a comment

Cherry Yogurt Bites

Once upon a time when I was a high school freshman, Greek yogurt hadn’t hit yet. It was so unknown, that someone in my Global Studies class was able to bring “Greek yogurt” as their contribution to an international food day. What they brought, however, was regular plain yogurt, with the addition of a ton of salt. Our teacher tried it and said it was good, so we all chugged it, and wow-oh-wow was that gross!

Based on its recent popularity, I’m pretty sure that that is not how Greek yogurt is made these days! (Actually, I think it’s just regular yogurt, strained to make it thicker?) The ‘real’ stuff can in fact be used to make some real tasty treats. This is a ridiculously simple recipe that you can make in a huge variety of flavors for a cool treat to help survive the summer.

IMG_6931Ingredients:

  • 1 1/2 cups vanilla Greek yogurt
  • 1 3 ounce package Jello, in this case cherry

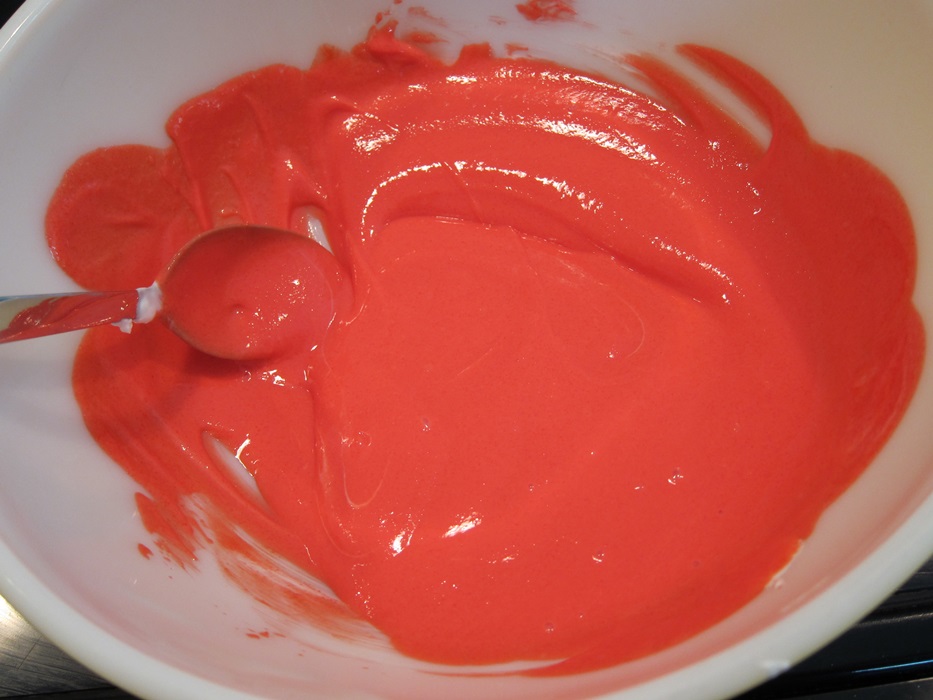
Line a cupcake pan with 6-7 papers, or mini-cupcake pans with 12-16 papers. Stir together the yogurt and Jello powder thoroughly. This was a pretty amazing color in person. You can use any flavor jello that sounds good to you.

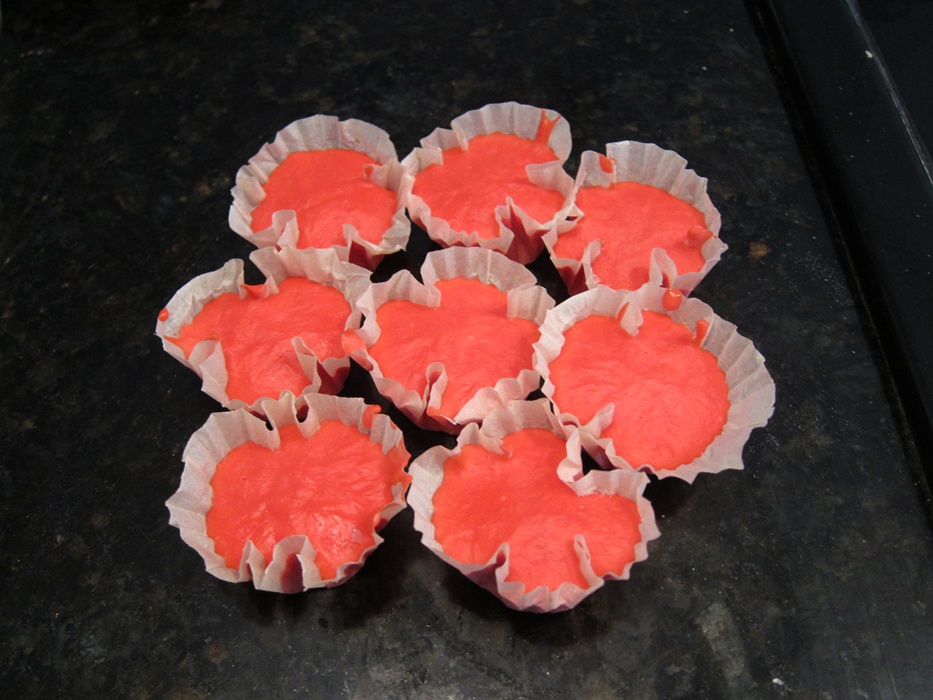
IMG_6929Microwave for 1 minute, stir, and microwave a second minute, to dissolve the Jello powder. Stir once more, then spoon into the lined pans.

IMG_6930Freeze for at least one hour, then enjoy!

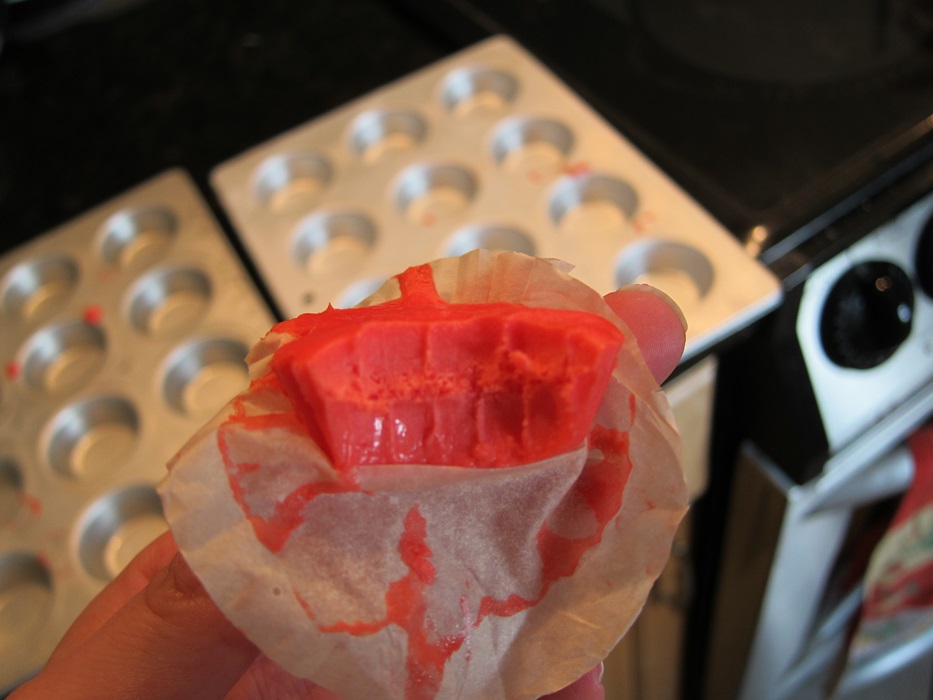
IMG_6932Once frozen, you can pop these out of the tins and store them in a plastic bag. Top with whipped cream, if desired, although I like just eating the mini-cupcake sized ones in a few bites straight from the freezer, without any fiddling around in the fridge.

Cherry Yogurt Bites

From Cookies and Cups.

  • 1 1/2 cups vanilla Greek yogurt
  • 1 3 ounce package Jello of your preferred flavor

Line a cupcake pan with 6-7 papers, or mini-cupcake pans with 12-16 papers.

Stir together the yogurt and Jello powder thoroughly. Microwave for 1 minute, stir, and microwave a second minute. Stir once more, then spoon into the lined pans.

Freeze for at least one hour, then eat or store in a plastic bag.

Posted in Dessert | Tagged , , | Leave a comment

Risotto with Chicken and Caramelized Onion

A pretty fast dinner to throw together, if you have some leftover cooked chicken in the fridge (or a package of pre-cooked chicken strips in the freezer).

IMG_6886Ingredients:

  • 4 tablespoons olive oil, divided
  • 1 onion, chopped
  • 1/4 cup balsamic vinegar
  • 1 1/2 cups uncooked arborio rice
  • 1/4 cup dry white wine (couldn’t find any in the house, skipped it)
  • 7 cups hot chicken broth
  • 2 tablespoons butter
  • 2 cups chopped cooked chicken breast
  • salt and pepper to taste
  • 2 tablespoons chopped fresh thyme

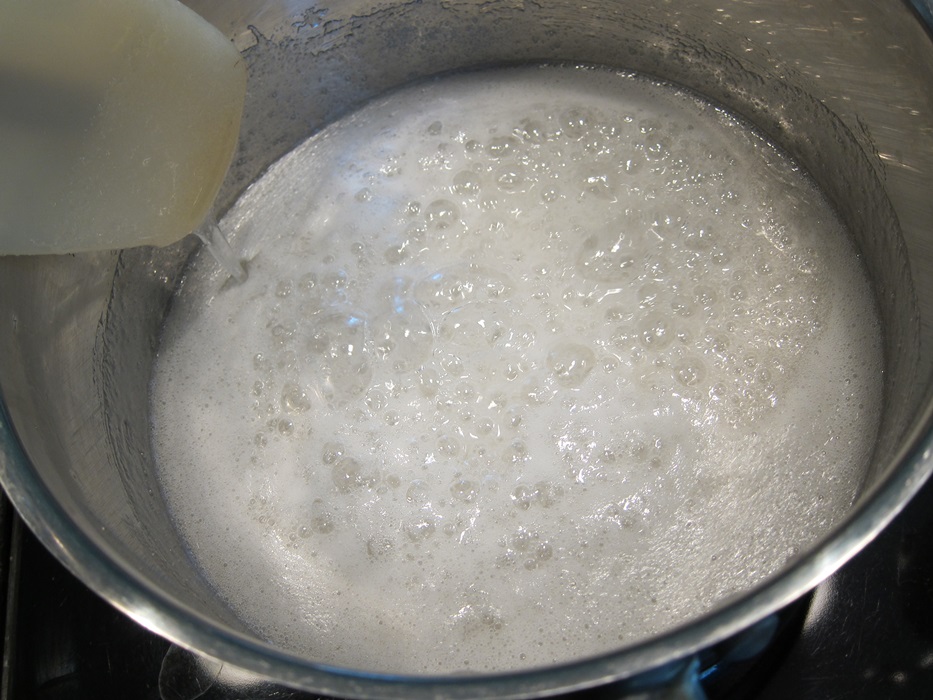
Heat 2 tablespoons of the oil in a saucepan over medium heat. Add the onions and saute 15-20 minutes, until golden. During this time, bring the broth up to a low simmer.
Whoops, that's not a saucepan.

Whoops, that’s not a saucepan.

Remove the onions from the heat, stir in the balsamic vinegar, and set aside.

Heat the remaining 2 tablespoons of oil in a large skillet over medium heat. Stir in the rice, and let heat about 2 minutes. Pour in the wine and reduce the heat to medium low. Add the broth, about 1 cup at a time, letting each cup of broth absorb before you add the next, until all the broth has been added and absorbed, about 20 minutes.

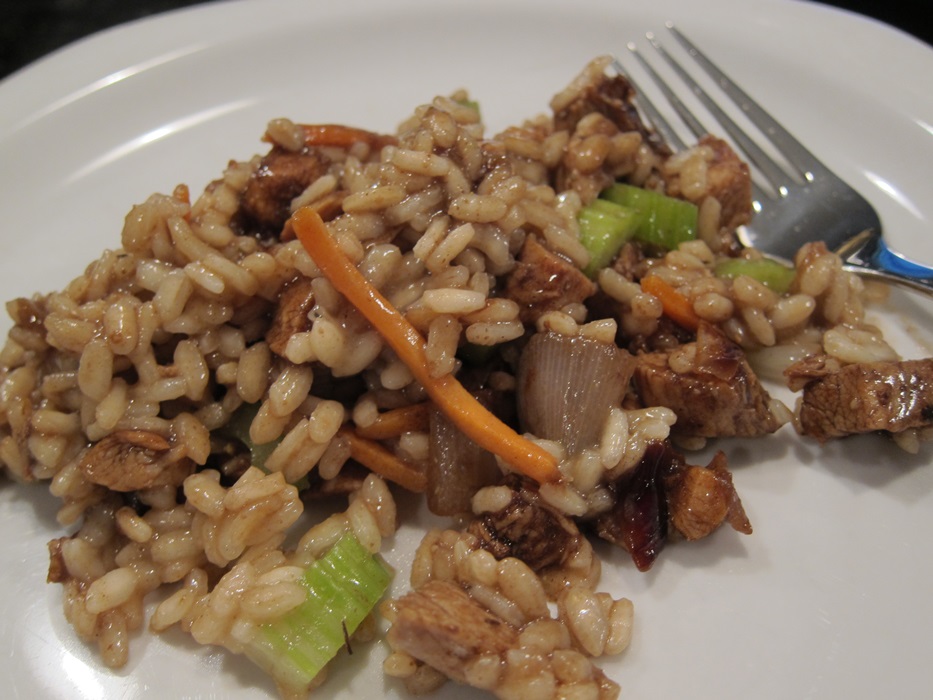
IMG_6884Add the onion mixture and continue to cook until the onions are re-warmed. Remove from the heat and add the butter and chicken. Season with salt and pepper, and garnish with thyme. I thought it was a bit boring looking, visually, so added some carrot shreds and celery, for a bit more color.

IMG_6885Tasty, flavorful, and filling!

Risotto with Chicken and Caramelized Onion

From AllRecipes.

  • 4 tablespoons olive oil, divided
  • 1 onion, chopped
  • 1/4 cup balsamic vinegar
  • 1 1/2 cups uncooked arborio rice
  • 1/4 cup dry white wine (couldn’t find any in the house, skipped it)
  • 7 cups hot chicken broth
  • 2 tablespoons butter
  • 2 cups chopped cooked chicken breast
  • salt and pepper to taste
  • 2 tablespoons chopped fresh thyme
  • any vegetables, as desired

Heat 2 tablespoons of the oil in a saucepan over medium heat. Add the onions and saute 15-20 minutes, until golden. During this time, bring the broth up to a low simmer. Remove the browned onions from the heat, stir in the balsamic vinegar, and set aside.

Heat the remaining 2 tablespoons of oil in a large skillet over medium heat. Stir in the rice, and let heat about 2 minutes. Pour in the wine and reduce the heat to medium low. Add the broth, about 1 cup at a time, letting each cup of broth absorb before you add the next, until all the broth has been added and absorbed, about 20 minutes.

Add the onion mixture and continue to cook until the onions are re-warmed. Remove from the heat and add the butter, chicken, and any desired vegetables. Season with salt and pepper, and garnish each serving with thyme.

Posted in Dinner | Tagged | 2 Comments

Not Mac & Cheese

It’s been a while since I tried anything from the Wheat Belly Cookbook, mainly because so many of the recipes call for cauliflower, but finally it was time to stop avoiding it and give a cauliflower-heavy recipe a try. I already kinda knew cauliflower doesn’t have much taste, on its own, and it turns out when you pair that with cheese…it’s gonna work out alright.

IMG_6915Ingredients:

  • 5 tablespoons butter, divided
  • 1 small onion, minced
  • 1 clove garlic, minced
  • 2 tablespoons coconut flour
  • 1 13.6 ounce can coconut milk
  • 1/2 teaspoon dry mustard
  • 1/4 teaspoon sea salt
  • 2 cups shredded extra-sharp cheddar cheese
  • 1 large head cauliflower, in bite-sized pieces
  • 1/4 cup grated parmesan cheese
  • 2 tablespoons ground golden flaxseeds

Preheat oven to 350 degrees. Grease a 9X13″ dish. (The cookbook said 2 quart, but there’s no way this would have all fit!) Put the cauliflower in a large bowl.

In a medium saucepan over medium-high heat, melt 3 tablespoons of the butter. Add the onion and cook, stirring occasionally, until lightly browned.

IMG_6911Add the garlic and cook 1 minute, then add the coconut flour and cook, stirring constantly, until lightly browned.

IMG_6912Add the coconut milk, mustard, and salt, and bring to a boil, stirring constantly.

IMG_6913Remove from the heat and stir in the cheddar, then pour over the cauliflower and stir together well. Transfer to the greased dish. Cut the remaining 2 tablespoons of butter into small chunks and scatter with the parmesan and flaxseeds over the top of the dish.

IMG_6914Bake 30 minutes, or until bubbling and lightly browned.

IMG_6919My mother had apparently made it her entire life without ever eating cauliflower, so kind of picked and poked at it at first, even though she said it tasted good, but she ended up going back and adding some chicken and a few more veggies to the leftovers and voluntarily eating it the next day! Who would have ever believed.

Not Mac & Cheese

From the Wheat Belly Cookbook.

  • 5 tablespoons butter, divided
  • 1 small onion, minced
  • 1 clove garlic, minced
  • 2 tablespoons coconut flour
  • 1 13.6 ounce can coconut milk
  • 1/2 teaspoon dry mustard
  • 1/4 teaspoon sea salt
  • 2 cups shredded extra-sharp cheddar cheese
  • 1 large head cauliflower, in bite-sized pieces
  • 1/4 cup grated parmesan cheese
  • 2 tablespoons ground golden flaxseeds

Preheat oven to 350 degrees. Grease a 9X13″ dish. Put the cauliflower in a large bowl.

In a medium saucepan over medium-high heat, melt 3 tablespoons of the butter. Add the onion and cook, stirring occasionally, until lightly browned. Add the garlic and cook 1 minute, then add the coconut flour and cook, stirring constantly, until lightly browned. Add the coconut milk, mustard, and salt, and bring to a boil, stirring constantly. Remove from the heat and stir in the cheddar, then pour over the cauliflower and stir together well.

Transfer to the greased dish. Cut the remaining 2 tablespoons of butter into small chunks and scatter with the parmesan and flaxseeds over the top of the dish. Bake 30 minutes, or until bubbling and lightly browned.

Posted in Dinner | Tagged , , , | 1 Comment

Caramelized Peaches with Strawberry Sorbet

The Tour de France is going on this month, and as usual in the past year or two, tons of the teams’ chefs are on twitter, facebook, and various blogs. Seeing what the riders are having for dinner is always fun for me, and I was quite excited to find out that the chef for ORICA GreenEDGE (their capitalization, not mine!) was sharing a recipe a day on facebook. This is one of his desserts.

I really liked this, and I think you could serve it at anything from a cookout to a fairly fancy dinner. Certain factions in the house don’t believe that fruit-based items can be dessert, and are giant babies about eating peaches, but still admitted that the sorbet is excellent.

The recipe as written was kind of brief and doesn’t have a lot of guidance, so I’ll be writing it up as it worked for me. Because it’s from a non-US source, this recipe’s in metric measurements and requires a scale. It really is kind of worth having a scale around for more accurate measurements, and you can get pretty cheap ones on Amazon.

IMG_6909Ingredients:

Caramelized Peaches:

  • 4 peaches
  • 100 grams sugar
  • 1 vanilla pod (I used a small amount of vanilla paste)

Strawberry Sorbet:

  • 200g frozen strawberries
  • 1/2 liter water
  • 200 grams sugar
  • 2 grams gelatin
  • 1 lemon

To prepare the peaches, rinse and dry them, then cut into medium sized chunks, removing the pits.

Place the sugar in a pan, shaking the pan to spread the sugar fairly evenly. Place over medium low heat and cook until caramelized, shaking the pan occasionally to keep any one part from over-cooking. Keep a close eye on this, as sugar quickly goes from not-quite-ready to grossly burnt. Adding the peaches a few seconds early is greatly preferable to adding them to over-cooked sugar.

Nearly all melted, a few seconds more and you want to get your peaches in there!

Nearly all melted, a few seconds more and you want to get your peaches in there!

Add the peaches and seeds from the vanilla bean, and stir to coat. Reduce heat to low and let cook several minutes, stirring frequently. I found the peaches released quite a bit of liquid.

IMG_6904Remove from heat and let rest 1 hour.

To make the sorbet, combine the strawberries, water, and sugar in a pot. Bring to a boil over high heat, then reduce to medium heat and simmer, stirring occasionally, until the berries are very soft and most of their color has been leached out into the water. I was surprised how red the water got, and how grey-white the berries became.

These strawberries still have a bunch of color left to give!

These strawberries still have a bunch of color left to give!

Pour the mixture through a strainer into a bowl, squeezing the liquid out of the strawberries before discarding them. Add the gelatin powder into the still-hot liquid, and stir well for several minutes to ensure it dissolves. Add enough juice from the lemon, several drops at a time, that the mixture tastes bright and fresh. Set aside to cool to room temperature.

So red, so fruity!

So red, so fruity!

Freeze the liquid in your ice cream maker until firm.

IMG_6905Serve on top of the caramelized peaches, and drizzle with some of the excess liquid in the peaches, if desired.

I had to leave the cooked peaches sitting around for way longer than recommended, they were probably more vibrant looking earlier in the day... Still fantastic!

I had to leave the cooked peaches sitting around for way longer than recommended, they were probably more vibrant looking earlier in the day… Still fantastic!

Like I said, I thought this was great, and it’s gotta be way healthier than a lot of the stuff I normally eat for dessert!

Caramelized Peaches

From OGE’s Taste of the Tour facebook album.

Caramelized Peaches:

  • 4 peaches
  • 100 grams sugar
  • 1 vanilla pod

Strawberry Sorbet:

  • 200g frozen strawberries
  • 1/2 liter water
  • 200 grams sugar
  • 2 grams gelatin
  • 1 lemon

To prepare the peaches, rinse and dry them, then cut into medium sized chunks, removing the pits.

Place the sugar in a pan, shaking the pan to spread the sugar fairly evenly. Place over medium low heat and cook until caramelized, shaking the pan occasionally to keep any one part from over-cooking.

Add the peaches and seeds from the vanilla bean, and stir to coat. Reduce heat to low and let cook several minutes, stirring frequently. Remove from heat and let rest 1 hour.

To make the sorbet, combine the strawberries, water, and sugar in a pot. Bring to a boil over high heat, then reduce to medium heat and simmer, stirring occasionally, until the berries are very soft and most of their color has been leached out into the water.

Pour the mixture through a strainer into a bowl, squeezing the liquid out of the strawberries before discarding them. Add the gelatin powder into the still-hot liquid, and stir well for several minutes to ensure it dissolves. Add enough juice from the lemon, several drops at a time, that the mixture tastes bright and fresh. Set aside to cool to room temperature. Freeze the liquid in your ice cream maker until firm.

Serve sorbet on top of the caramelized peaches, and drizzle with some of the excess liquid in the peaches, if desired.

Posted in Dessert | Tagged , , , , | 5 Comments

Gluten-Free Red Velvet Cupcakes

These cupcakes use a baking soda and vinegar reaction to get rise that makes a really stinky batter, but creates a perfectly textured cupcake. (Oh, and the stink goes away, too.) I’d be quite pleased with this texture in a non-gf baked good! My mother wasn’t even sure if she liked red velvet before this, but the answer turns out to be a resounding Yes!

IMG_6881Ingredients:

  • 1 3/4 cup all-purpose gluten-free flour (I used Bob’s)
  • 1 teaspoon xanthan gum (omit if your blend already contains it)
  • 3/4 teaspoon kosher salt
  • 3/4 teaspoon baking soda
  • 2 tablespoons unsweetened cocoa powder
  • 1 cup sugar
  • 6 tablespoons unsalted butter, at room temperature
  • 2 extra-large eggs, at room temperature, lightly beaten (I used regular large eggs with no problem)
  • 1 teaspoon pure vanilla extract
  • 1 teaspoon cider vinegar
  • red gel food coloring to desired color
  • scant 1 cup milk, not skim, at room temperature

Preheat the oven to 325 degrees and line a muffin tin with papers.

Whisk together the flour, xanthan gum, salt, baking soda, cocoa powder, and sugar.

IMG_6875Add the butter, eggs, vanilla, vinegar, and a bit of food coloring. Because I was doing this by hand, not with a mixer, I cut the butter up quite small before I added the rest of the things to make sure it was getting mixed pretty well. It’s fine if the batter is still a bit lumpy.

Just getting started.

Just getting started.

Stir in the milk, then add more food coloring until you reach a shade you like.

IMG_6877Divide evenly in the muffin tin, then bake 25 minutes, or until a toothpick inserted in the center of one comes out clean.

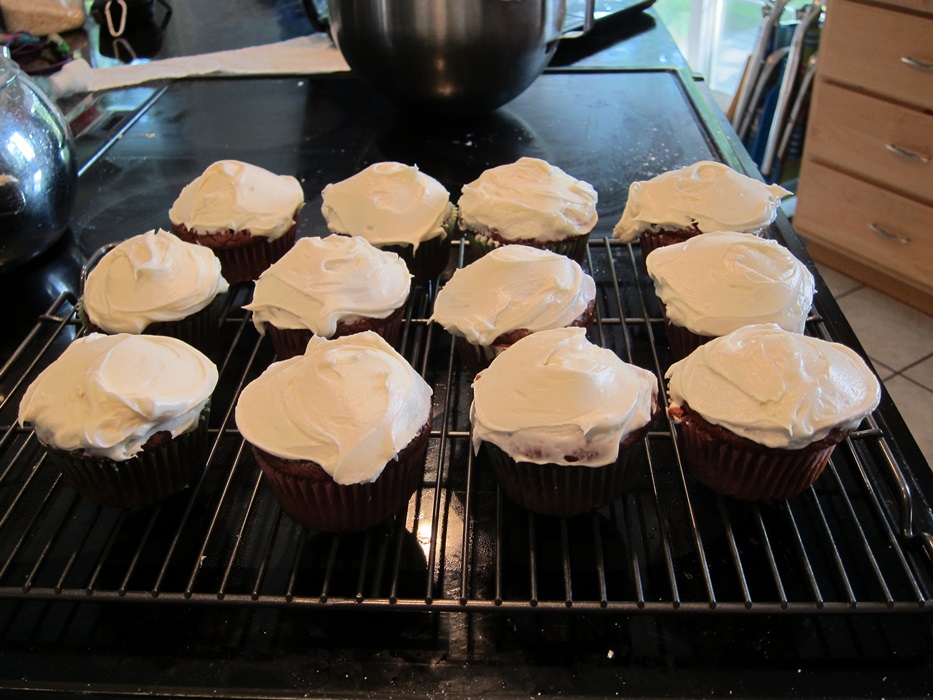
IMG_6880Carefully pry the cupcakes out of the pan to cool completely on a wire rack before frosting.

You’re kind of on your own for frosting, but most frostings I can think of are gluten free, and the internet has tons of frosting recipes! I made a cream cheese frosting but didn’t do any measuring as I worked, just threw the extra 2 tablespoons of butter (from the stick I got the 6 tablespoons in the batter from), some vanilla, and a big blob of cream cheese (6 ounces? No idea, I got it out of two different containers.) in the mixer and started beating in (1 1/2? 2?) cups of powdered sugar until I got a consistency I liked. Scientific!

IMG_6882

Delightfully fluffy!

Delightfully fluffy!

Gluten-Free Red Velvet Cupcakes

From Gluten-Free on a Shoestring.

  • 1 3/4 cup all-purpose gluten-free flour
  • 1 teaspoon xanthan gum (omit if your blend already contains it)
  • 3/4 teaspoon kosher salt
  • 3/4 teaspoon baking soda
  • 2 tablespoons unsweetened cocoa powder
  • 1 cup sugar
  • 6 tablespoons unsalted butter, at room temperature
  • 2 extra-large eggs, at room temperature, lightly beaten
  • 1 teaspoon pure vanilla extract
  • 1 teaspoon cider vinegar
  • red gel food coloring to desired color
  • scant 1 cup milk, not skim, at room temperature

Preheat the oven to 325 degrees and line a muffin tin with papers.

Whisk together the flour, xanthan gum, salt, baking soda, cocoa powder, and sugar. Add the butter, eggs, vanilla, vinegar, and a bit of food coloring. The batter will be a bit lumpy. Stir in the milk, then add more food coloring until you reach a shade you like.

Divide evenly in the muffin tin, then bake 25 minutes, or until a toothpick inserted in the center of one comes out clean. Carefully remove the cupcakes from the pan to cool completely on a wire rack before frosting.

Posted in Dessert | Tagged , , , | Leave a comment

Wheat Gift Bread

I was looking for a bread with a sourdough flavor and a shape-able dough the other day. I saw this bread, which was actually kind of clear from the ingredient list that it’d be more wheat-y than sour, but I tried it out. I didn’t get the sourdough flavor at all, but it also didn’t have the unpleasant bitterness you sometimes get with whole wheat flour. Just a generally pleasant soft wheat bread that I enjoyed, and would eat again.

I am pretty terrible at tying bows, turns out.

I am pretty terrible at tying bows, turns out.

Ingredients:

  • 1 cup rye flour
  • 1 cup warm water
  • 1 3/4 teaspoons dry yeast, divided
  • 1 cup bread flour
  • 1 cup whole wheat flour (or another cup of bread flour)
  • 1 1/2 teaspoon salt
  • 2 tablespoons sugar
  • 2 tablespoons vegetable oil
  • about 1/3 cup coarsely chopped nuts (optional)
  • about 1 tablespoon sesame seeds (optional)
  • enough water to make a soft, but firm dough

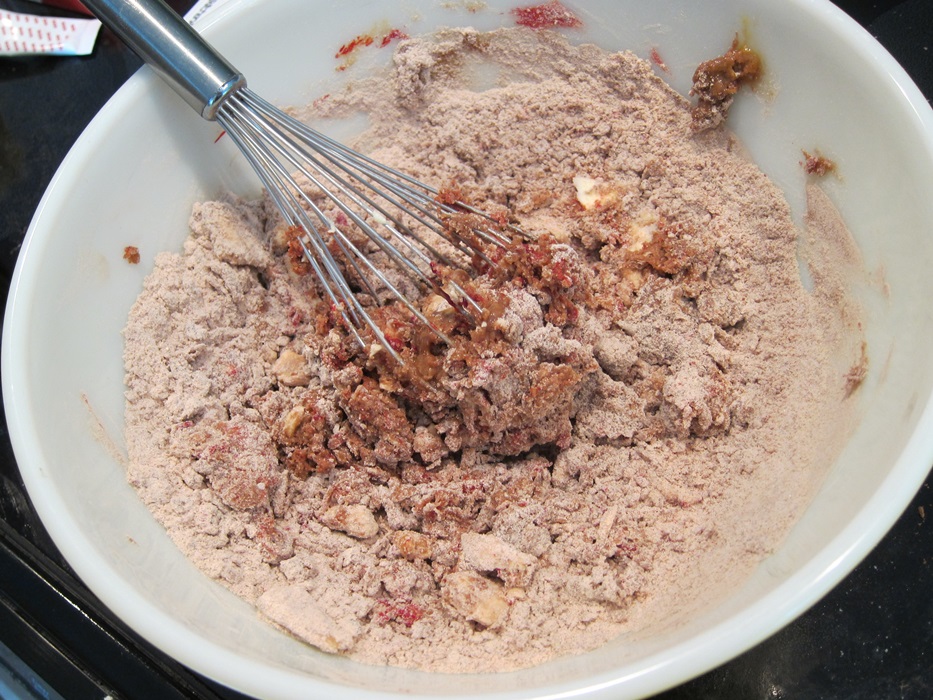
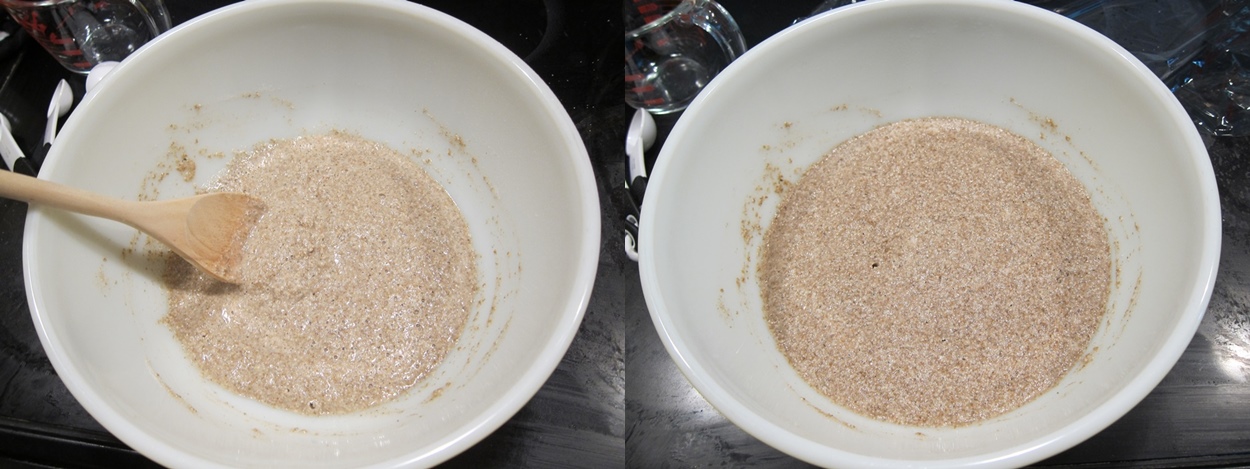
The night before, create a sponge by stirring together the rye flour, cup of water, and 1/4 teaspoon yeast. Cover with plastic wrap and let sit at room temperature overnight.

spongeThe next day, mix the remaining 1 1/2 teaspoons yeast, the bread and whole wheat flours, the salt, sugar, and oil into the sponge.

IMG_6843Knead together, adding additional water 1 tablespoon at a time if necessary. I didn’t need any to get a nice soft dough. Knead in the nuts and seeds if using.

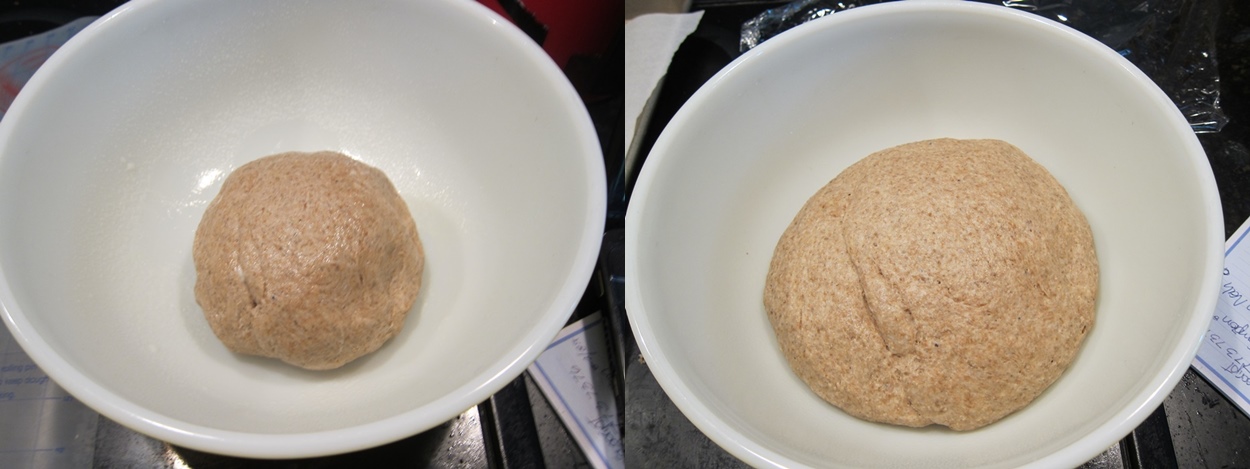
Shape into a ball and place in a greased bowl, rotating to grease all over. Cover, and let rise until doubled, 1 – 1 1/2 hours.

first risePunch down the dough and divide into two equal parts. Shape each into a ball, and then flatten into a rounded square.

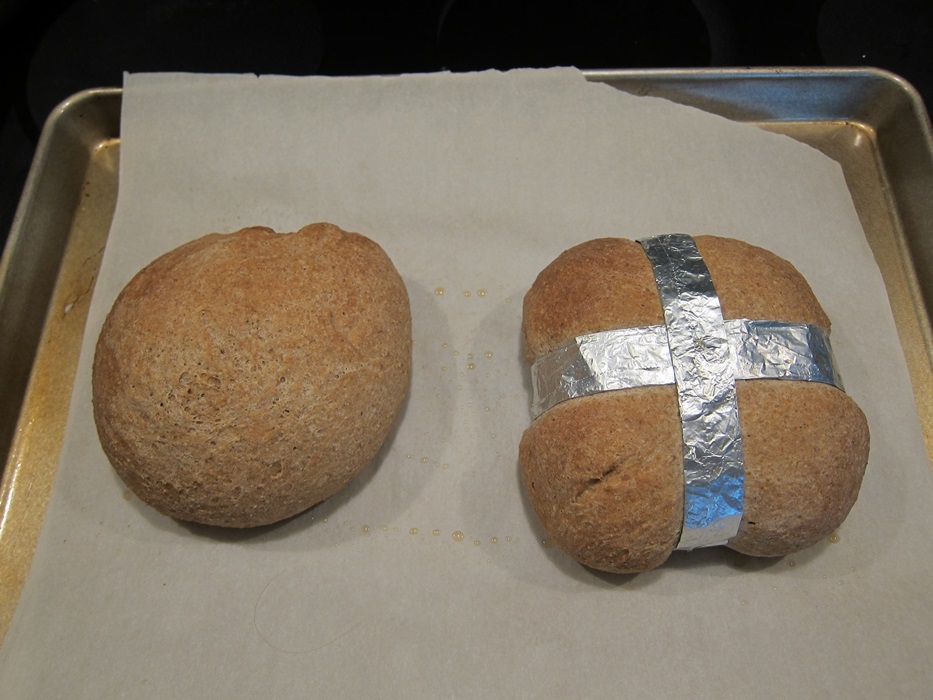
IMG_6847Fold four strips of tin foil into strips the width of your ribbon. I folded a straight edge on one side, and then would fold the other side up to fit into the ribbon spool to get the right size. Grease the foil, and then fold it over the dough in an X.

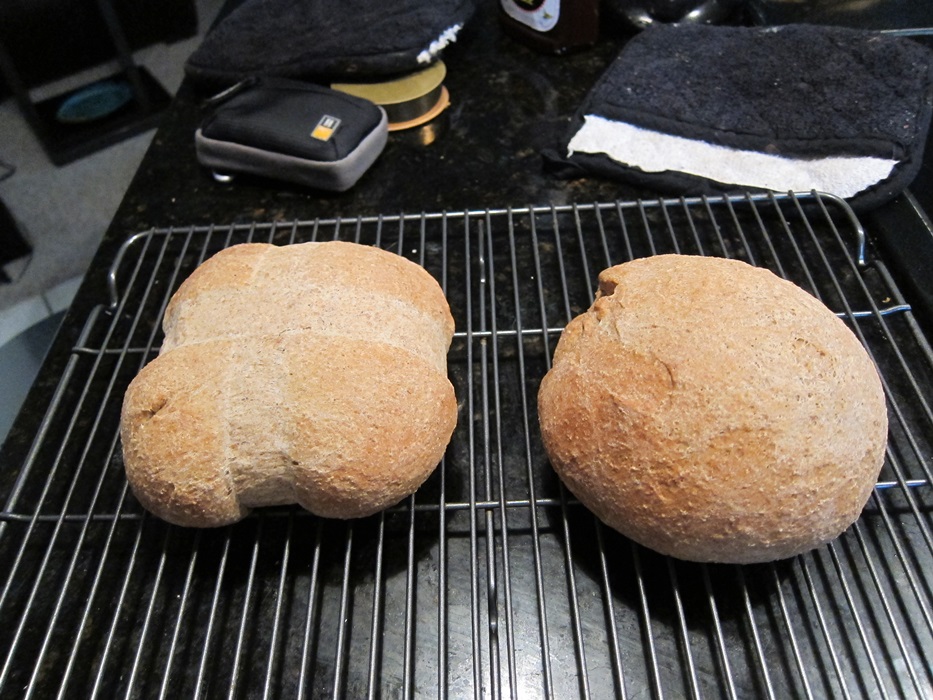
IMG_6848Grease some plastic wrap and cover the bread and let rise, about an hour. I only shaped one half of the dough, but you can see that it rose around the foil some.

IMG_6851Preheat the oven to 375 degrees, sprinkle the surface of the bread with water, and bake about 25 minutes, until the loaves sound hollow when tapped on the bottom.

IMG_6852Remove the foil and let cool completely on a wire rack.

IMG_6853Once cool, tie a bow! Put the middle of the ribbon on the top of the bread, then twist underneath to come up on the other sides.

IMG_6854I think it looks fun and festive!

Wheat Gift Bread

Recipe from BreadMan Talking, shaping technique from Bread Experience.

  • 1 cup rye flour
  • 1 cup warm water
  • 1 3/4 teaspoons dry yeast, divided
  • 1 cup bread flour
  • 1 cup whole wheat flour (or another cup of bread flour)
  • 1 1/2 teaspoon salt
  • 2 tablespoons sugar
  • 2 tablespoons vegetable oil
  • about 1/3 cup coarsely chopped nuts (optional)
  • about 1 tablespoon sesame seeds (optional)
  • enough water to make a soft, but firm dough

The night before, create a sponge by stirring together the rye flour, cup of water, and 1/4 teaspoon yeast. Cover with plastic wrap and let sit at room temperature overnight.

The next day, mix the remaining 1 1/2 teaspoons yeast, the bread and whole wheat flours, the salt, sugar, and oil into the sponge. Knead together, adding additional water 1 tablespoon at a time if necessary. Knead in the nuts and seeds if using. Shape into a ball and place in a greased bowl, rotating to grease all over. Cover, and let rise until doubled, 1 – 1 1/2 hours.

Punch down the dough and divide into two equal parts. Shape each into a ball, and then flatten into a rounded square. Fold four strips of tin foil into strips the width of your ribbon. Grease the foil, and then fold it over the dough in an X. Grease some plastic wrap and cover the bread and let rise, about an hour.

Preheat the oven to 375 degrees, sprinkle the surface of the dough with water, and bake about 25 minutes, until the loaves sound hollow when tapped on the bottom.

Remove the foil and let cool loaves completely on a wire rack before tying a bow around each loaf.

Posted in Bread | Tagged , , , , | Leave a comment

Reese’s Fudge Pie

This pie is a really rich combination of graham cracker crust, fudge layer, and fluffy peanut butter top. As you’d imagine, those go really well together, and will leave everyone happily comatose. I made it with my friend Ted, who may not have been on the blog since January 2012, when we made Salted Caramel Butter Bars (oooh man!).

IMG_6872Ingredients:

Crust:

  • 9 graham crackers, crushed
  • 1/3 cup melted butter
  • 1/3 cup sugar

Fudge:

  • 1 14 ounce can of sweetened condensed milk
  • 2 cups milk chocolate chips
  • 1 cup semi-sweet chocolate chips
  • 1/4 teaspoon salt
  • 2 teaspoon vanilla
  • 1 7 ounce bag Reese’s Minis

Peanut Butter Mousse:

  • 1 cup peanut butter
  • 1 cup powdered sugar
  • 8 ounce room temp cream cheese
  • 1 1/2 cups Cool Whip, thawed
  • optional 1/4 cup melted chocolate for drizzle

Preheat your oven to 350 degrees. If you haven’t already, crush your graham crackers.

Yep, Ted is punching graham crackers.

Yep, Ted is punching graham crackers.

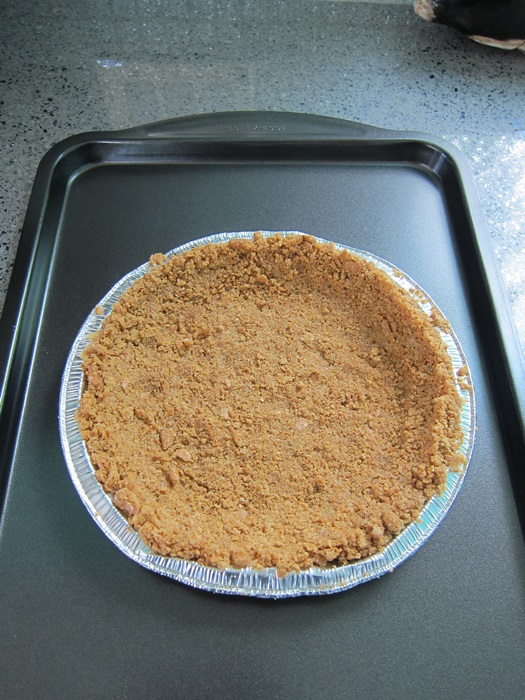
Mix together the grahams cracker crumbs, butter, and sugar, and press into the bottom of a springform or pie pan. A springform pan will be a bit bigger, and give you a slightly wider, thinner pie. We were working with a limited kitchen, so random pie tin from something else won.

IMG_6858

Yep, Ted is punching graham crackers.

IMG_6859

If you’re worried about overflow, it’s easy enough to put the pie on a pan to catch any extra.

Bake 8 minutes, then set aside. You’re done with the oven at this point, and can turn that off.

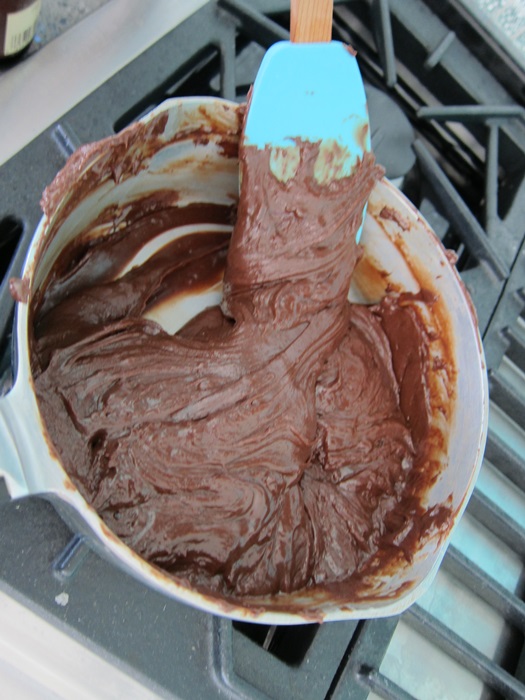
To make the fudge layer, combine all the ingredients except for the Reese’s in a saucepan over low heat. Cook, stirring constantly, until smooth.

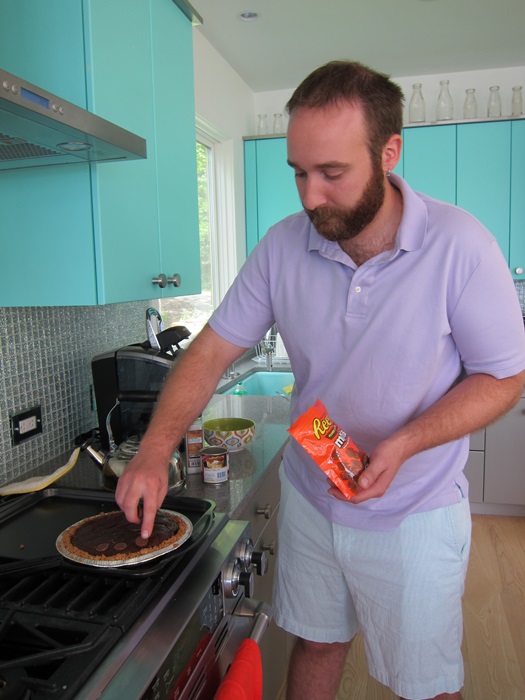
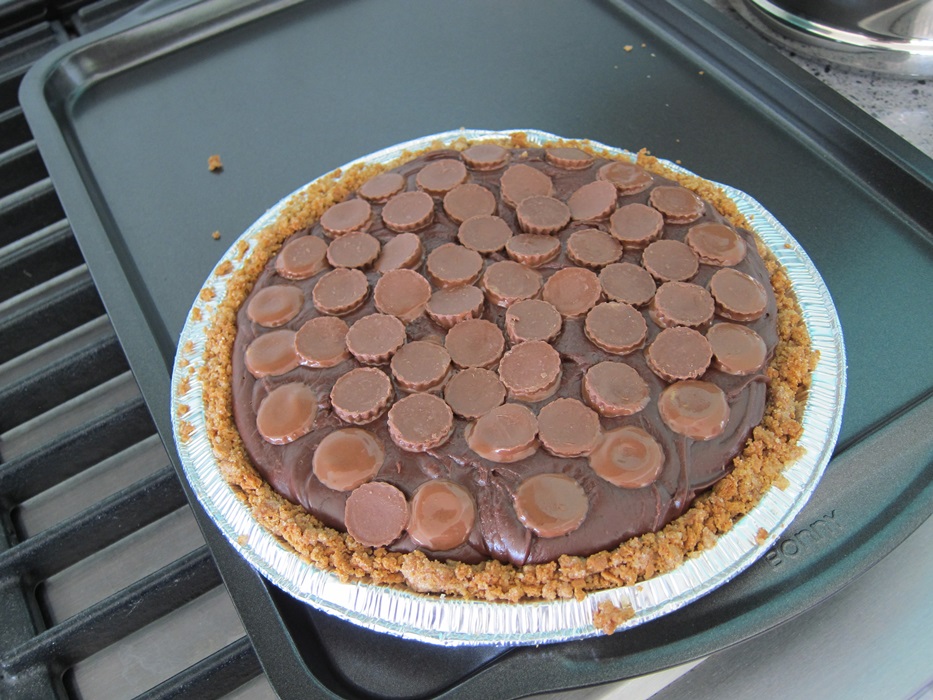
IMG_6860Pour into the pie crust, then press the Reese’s into the top of the fudge layer.

IMG_6861If you want the Reese’s to remain super well defined, let the fudge cool a bit first, so the fudge doesn’t start melting the Reese’s. It could be a bit challenging to jam them in by the time it’s cool enough not to melt the Reese’s, though, so we just stuck ’em in right away. With the smaller surface area in a pie tin, they cover the top pretty tightly.

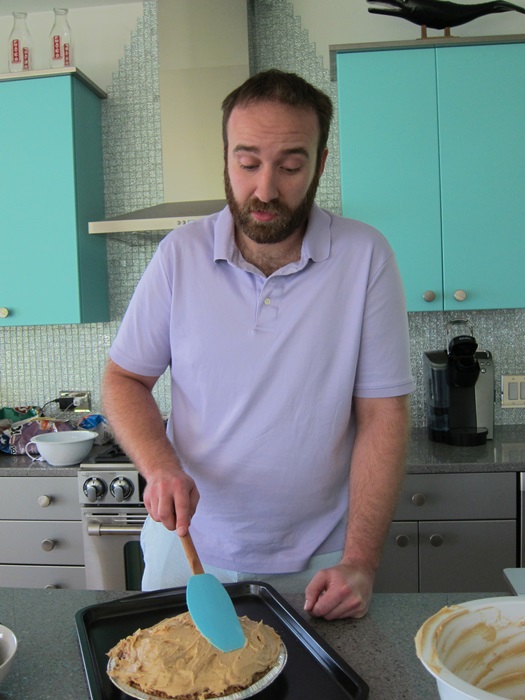
IMG_6862To make the mousse, mix the peanut butter, cream cheese, and powdered sugar in a large bowl until smooth. This would be easier with a mixer, but Ted did an impressive job at getting it real smooth by hand. (Like I said, limited kitchen.) Fold in the Cool Whip.

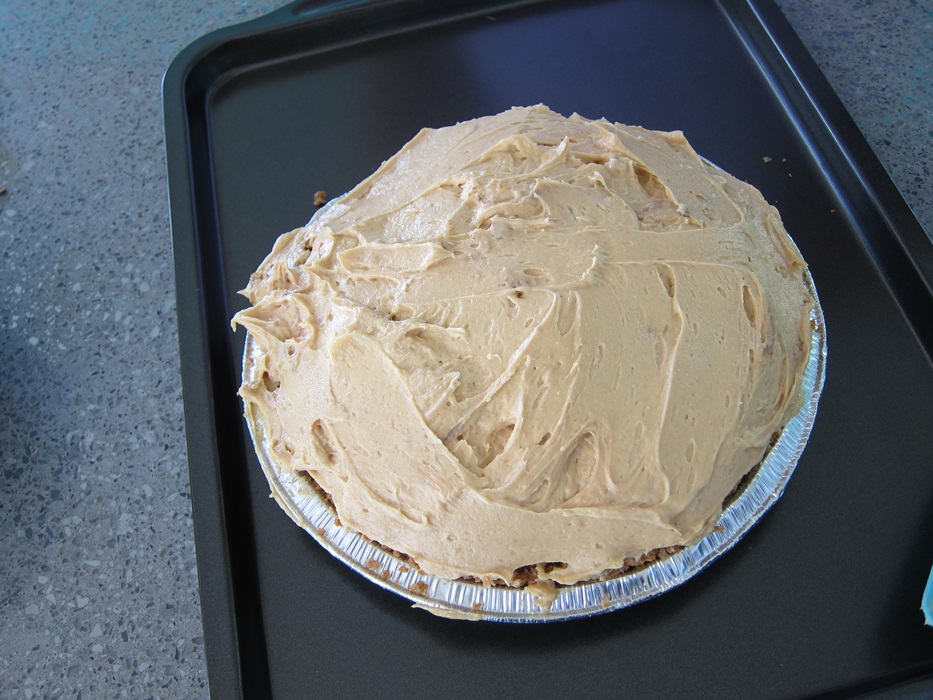
IMG_6863Spread on top of the fudge layer.

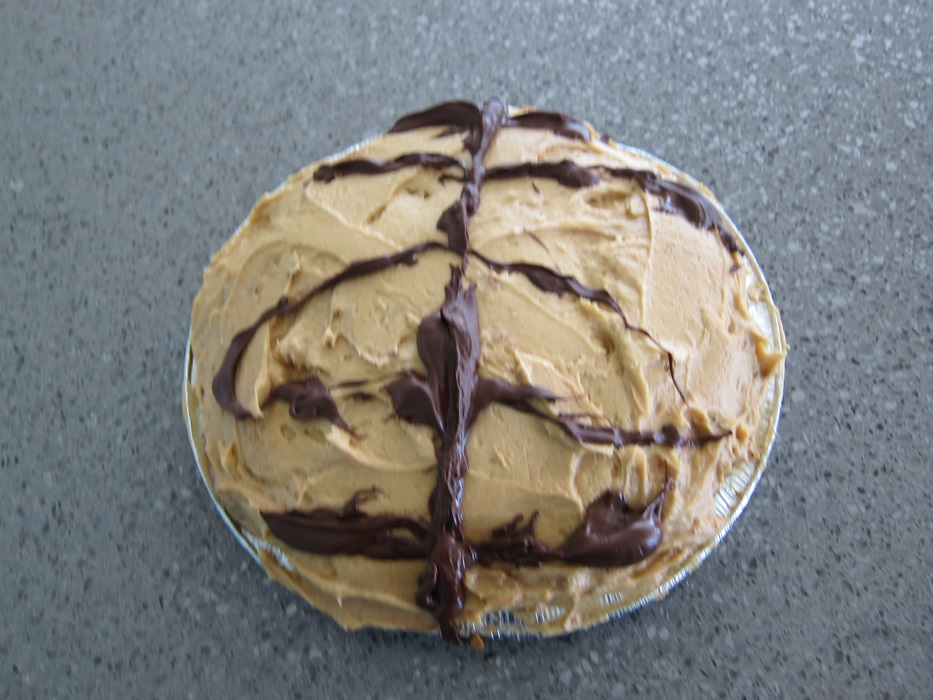
IMG_6866IMG_6867Drizzle the melted chocolate on top, if desired.

    IMG_6868Refrigerate before serving. We only chilled 20-30 minutes at first, and it was easier to slice then, but it does actually hold together way better if you chill at least an hour.

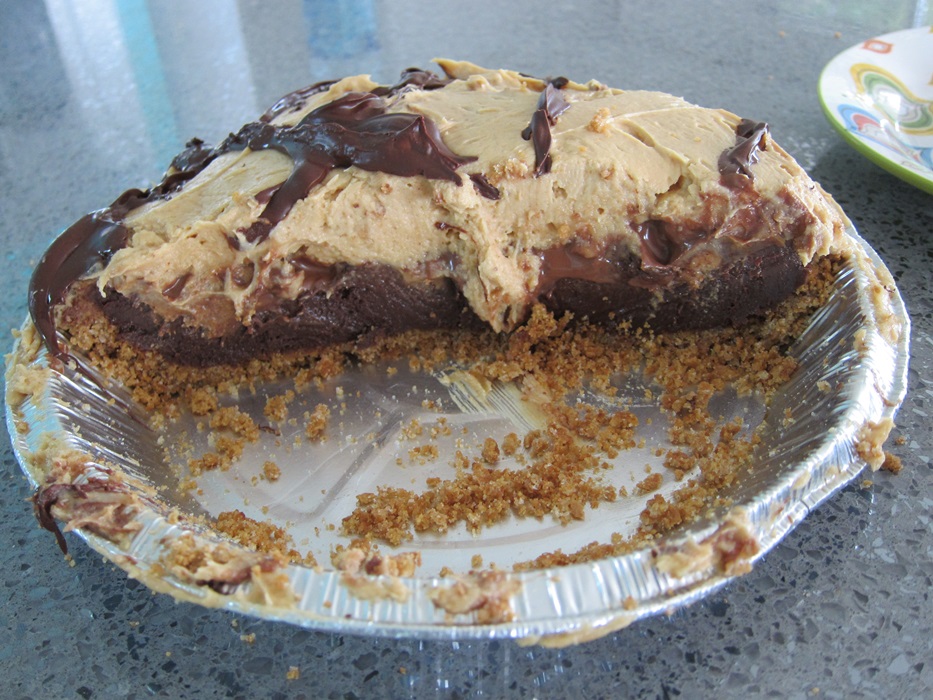
    IMG_6869IMG_6871Super delicious! And yay for friends!

    Reese’s Fudge Pie

    From Cookies & Cups.

    Crust:

    • 9 graham crackers, crushed
    • 1/3 cup melted butter
    • 1/3 cup sugar

    Fudge:

    • 1 14 ounce can of sweetened condensed milk
    • 2 cups milk chocolate chips
    • 1 cup semi-sweet chocolate chips
    • 1/4 teaspoon salt
    • 2 teaspoon vanilla
    • 1 7 ounce bag Reese’s Minis

    Peanut Butter Mousse:

    • 1 cup peanut butter
    • 1 cup powdered sugar
    • 8 ounce room temp cream cheese
    • 1 1/2 cups Cool Whip, thawed
    • optional 1/4 cup melted chocolate for drizzle

    Preheat oven to 350 degrees.

    Mix together the grahams cracker crumbs, butter, and sugar, and press into the bottom of a springform or pie pan. Bake 8 minutes, then set aside.

    To make the fudge layer, combine all the ingredients except for the Reese’s in a saucepan over low heat. Cook, stirring constantly, until smooth. Pour into the pie crust, then press the Reese’s into the top of the fudge layer.

    To make the mousse, mix the peanut butter, cream cheese, and powdered sugar in a large bowl until smooth. Fold in the Cool Whip, then spread on top of the fudge layer.

    Drizzle the melted chocolate on top, if desired.

    Refrigerate before serving.

    Posted in Dessert | Tagged , , , , | 2 Comments