Gluten-Free Cinnamon Roll Pound Cake

This is a tasty cake, and it’s also very dense. This makes it a good option when you need a cake that can travel because, say, your gluten-free friend’s family got a giant, non-gf cake for the friend’s graduation party. This cake to the rescue!

IMG_6675Ingredients:

  • 2 cups gluten-free all-purpose flour mix
  • 2 teaspoons baking powder
  • 1/2 teaspoon salt
  • 1 cup unsalted butter, room temperature
  • 3/4 cup granulated sugar
  • 4 large eggs
  • 2 1/2 teaspoons vanilla extract, divided
  • 1 tablespoon ground cinnamon
  • 1/2 cup powdered sugar
  • 1 tablespoon milk

Preheat oven to 350 degrees. Grease a 9X5″ loaf pan, then set aside. Combine the flour mix, baking powder, and salt in a small bowl and set aside.

In a large bowl, beat the butter and sugar on medium-high until fluffy. Reduce the speed to medium-low and beat in the eggs, one at a time, followed by 2 teaspoons of the vanilla.
Yuck!

Yuck!

Reduce the speed further, to low, and gradually add the flour mixture, beating until just combined.

IMG_6667Transfer half the batter into a small bowl and stir the cinnamon in until evenly mixed.
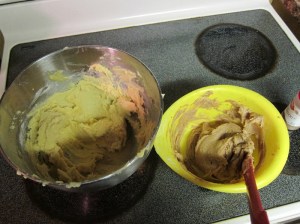
IMG_6668Spoon the batter, alternating cinnamon and vanilla, into the greased pan.

IMG_6669Swirl the two colors together lightly with a knife.

IMG_6670Bake 40-50 minutes, until the cake passes the toothpick test.
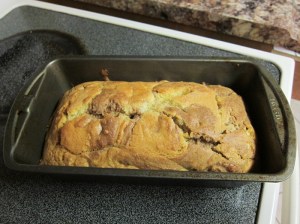
IMG_6671Cool in the pan on a wire rack for 15 minutes, then remove from the pan and cool, still on the rack, approximately another hour, until completely cool.

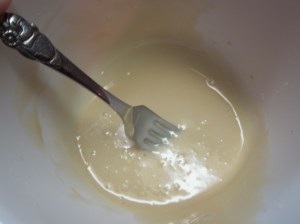
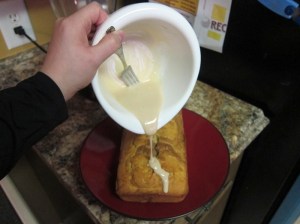
IMG_6672In a small bowl, whisk together the powdered sugar, milk, and remaining 1/2 teaspoon of vanilla, then drizzle over the cooled cake.
IMG_6673 IMG_6674 20151219_210439

Gluten-Free Cinnamon Roll Pound Cake

From Betty Crocker.

  • 2 cups gluten-free all-purpose flour mix
  • 2 teaspoons baking powder
  • 1/2 teaspoon salt
  • 1 cup unsalted butter, room temperature
  • 3/4 cup granulated sugar
  • 4 large eggs
  • 2 1/2 teaspoons vanilla extract, divided
  • 1 tablespoon ground cinnamon
  • 1/2 cup powdered sugar
  • 1 tablespoon milk

Preheat oven to 350 degrees. Grease a 9X5″ loaf pan, then set aside. Combine the flour mix, baking powder, and salt in a small bowl and set aside.

In a large bowl, beat the butter and sugar on medium-high until fluffy. Reduce the speed to medium-low and beat in the eggs, one at a time, followed by 2 teaspoons of the vanilla. Reduce the speed further, to low, and gradually add the flour mixture, beating until just combined.

Transfer half the batter into a small bowl and stir the cinnamon in until evenly mixed. Spoon the batter, alternating cinnamon and vanilla, into the greased pan. Swirl together with a knife, then bake 40-50 minutes, until the cake passes the toothpick test.

Cool in the pan on a wire rack for 15 minutes, then remove from the pan and cool, still on the rack, approximately another hour, until completely cool.

In a small bowl, whisk together the powdered sugar, milk, and remaining 1/2 teaspoon of vanilla, then drizzle over the cooled cake.


Posted in Dessert | Tagged , , , | 2 Comments

Chicken, Bacon, and Orzo Soup

A bunch of food blogs I follow started 2016 with suggested meal plans giving you new meals for weeks or months. Personally, I started the year eating leftover meatballs from New Years until I finally threw out the remainder last night. Time to move on! And what better way to start than with delicious soup? This soup is made pretty quickly, and requires very few dishes, and it disappears quickly too! Don’t expect many days of leftovers with this one!

IMG_6688Ingredients:

  • 5 slices bacon
  • 2 cups yellow onion, diced
  • 2 cloves garlic, minced
  • 1 cup celery, diced
  • 1 cup carrots, diced
  • 1 pound boneless skinless chicken breasts
  • 6 cups chicken stock
  • 1/2 cup uncooked orzo
  • 1 1/2 teaspoons kosher salt or to taste
  • 1/2 teaspoon fresh ground black pepper or to taste
  • chopped fresh parsley to taste

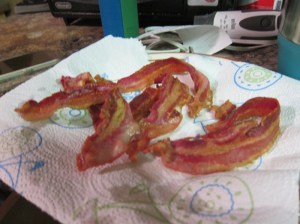
In a large dutch oven or a large, heavy bottomed saucepan, cook the bacon over low heat until enough bacon grease has melted out to cover the bottom of the pan. Raise the heat a bit and cook the bacon until crisp, then remove to a paper towel-lined plate. If you have more than 2-3 tablespoons of bacon grease remaining in the pan, discard the extra.

IMG_6682Add the chopped onion, garlic, celery, and carrots to the remaining bacon grease in the pan and top with a pinch of salt. Cook over medium heat, stirring occasionally, until the vegetables have begun caramelizing. Keep an eye out for brown edges to have an idea when they’re ready.

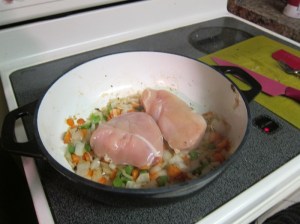
IMG_6683Place the whole chicken breasts on top of the vegetables, then pour in the chicken stock.
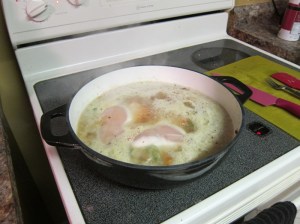
IMG_6684 IMG_6686Bring to a boil, cover, and reduce heat to low, simmering for 20 minutes. Keep an eye on it – low turned out to be too low for mine, as it wasn’t bubbling at all at the end of the 20 minutes, so my chicken hadn’t cooked quite enough yet. Remove the cooked chicken to a cutting board and shred with 2 forks. Set aside.

Return the soup to a boil and add the orzo. Cook 8 minutes, then add the chicken back and season with salt and pepper.

IMG_6687Dice the cooked bacon (which hopefully you haven’t eaten all of by now) and use bacon and parsley to garnish each bowl.
There will be a lot of good flavors going on in your bowl!

Chicken, Bacon, and Orzo Soup

From Savory Simple.

  • 5 slices bacon
  • 2 cups yellow onion, diced
  • 2 cloves garlic, minced
  • 1 cup celery, diced
  • 1 cup carrots, diced
  • 1 pound boneless skinless chicken breasts
  • 6 cups chicken stock
  • 1/2 cup uncooked orzo
  • 1 1/2 teaspoons kosher salt or to taste
  • 1/2 teaspoon fresh ground black pepper or to taste
  • chopped fresh parsley to taste

In a large dutch oven or a large, heavy bottomed saucepan, cook the bacon over low heat until enough bacon grease has melted out to cover the bottom of the pan. Raise the heat a bit and cook the bacon until crisp, then remove to a paper towel-lined plate. If you have more than 2-3 tablespoons of bacon grease remaining in the pan, discard the extra.

Add the chopped onion, garlic, celery, and carrots to the remaining bacon grease in the pan and top with a pinch of salt. Cook over medium heat, stirring occasionally, until the vegetables have begun caramelizing. Keep an eye out for brown edges to have an idea when they’re ready.

Place the whole chicken breasts on top of the vegetables, then pour in the chicken stock. Bring to a boil, cover, and reduce heat to low, simmering for 20 minutes. Remove the cooked chicken to a cutting board and shred with 2 forks. Set aside.

Return the soup to a boil and add the orzo. Cook 8 minutes, then add the chicken back and season with salt and pepper.

Dice the cooked bacon and use bacon and parsley to garnish each bowl.


Posted in Dinner | Tagged , , , | 2 Comments

Tak Toritang (Spicy Korean Chicken and Potatoes)

I went to AllRecipes recently looking for inspiration, and 90% of what it was showing me was Korean. No complaints there!

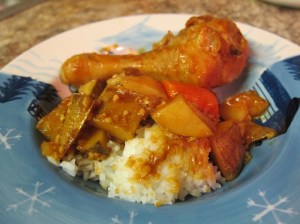
IMG_6648This dish ended up being the winner, and it’s pretty delightful/delicious! It’s also simple – the gochujang is really the only slightly unusual ingredient, and that’s certainly been in quite a few of my recipes lately.
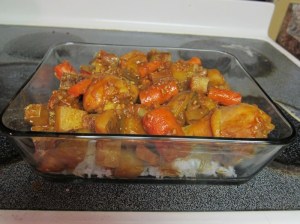
IMG_6651Many of the comments on the AllRecipe page emphasize that using a cut of chicken with bones is important to the flavor. They recommend drummettes, which my supermarket didn’t have, so I went with drumsticks. (Apparently, as the name hints, drummettes are smaller.) They worked fine, although for the portions I took to work for lunch, I shredded the chicken off the bone while packing it so I didn’t have to make a mess in front of people.
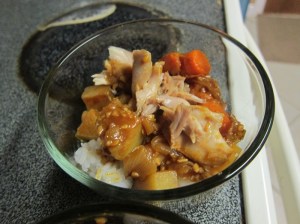
Lunch!

Lunch!

Ingredients:

  • 2 1/2 pounds chicken drummettes/other bone-in cut of chicken
  • 2 large potatoes, cut into chunks
  • 2 carrots, cut into 2″ pieces
  • 1 large onion, chopped
  • 3 cloves garlic, crushed
  • 1/4 cup water
  • 1/2 cup soy sauce
  • 2 tablespoons white sugar
  • 3 heaping tablespoons Korean hot pepper paste (gochujang)
  • white rice, for serving

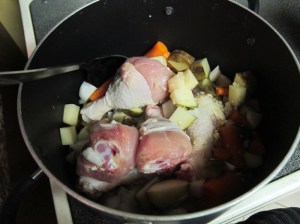
In a large pot, combine the chicken, potatoes, carrots, onion, and garlic over medium heat.

IMG_6643Pour the water and soy sauce over the chicken, then stir in the sugar and gochujang.
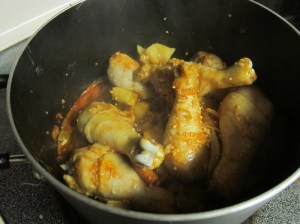
IMG_6644Bring the mixture to a boil, then reduce the heat to low and simmer 45 minutes. Because this was so little liquid, lots of the chicken and potato were above the line of the liquid, so I covered the pot for the first half hour, stirring every 5-10 minutes, to ensure all of the chicken was cooked fully. For the last 15 minutes let it simmer uncovered, to thicken the sauce. You’ll find that as the chicken and veggies cook, they release some of their own moisture so you wind up with much more than the 3/4 cup of liquid you start with.
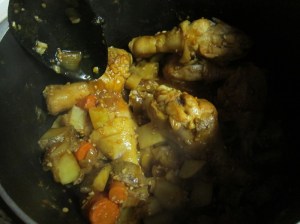
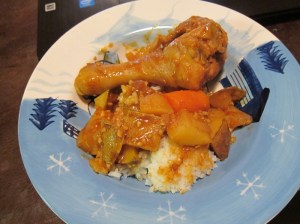
IMG_6645Serve over rice. Easy!

IMG_6646

Tak Toritang

From AllRecipes.

  • 2 1/2 pounds chicken drummettes/other bone-in cut of chicken
  • 2 large potatoes, cut into chunks
  • 2 carrots, cut into 2″ pieces
  • 1 large onion, chopped
  • 3 cloves garlic, crushed
  • 1/4 cup water
  • 1/2 cup soy sauce
  • 2 tablespoons white sugar
  • 3 heaping tablespoons Korean hot pepper paste (gochujang)
  • white rice, for serving

In a large pot, combine the chicken, potatoes, carrots, onion, and garlic over medium heat. Pour the water and soy sauce over the chicken, then stir in the sugar and gochujang. Bring the mixture to a boil, then reduce the heat to low and simmer 45 minutes. Cover for the first half hour, except when stirring every 5-10 minutes. For the last 15 minutes let it simmer uncovered, to thicken the sauce.

Serve over rice.


Posted in Dinner | Tagged , | 3 Comments

Hamantashen

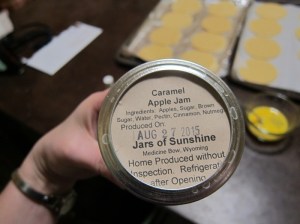
There was a craft fair in Rawlins a week or two ago, at which I got caramel apple jam and chocolate strawberry jam from some local-in-Wyoming-distances people. I wasn’t actually sure what to do with them, until I remembered these cookies, the best way to use up good jam flavors. (Technically you can do date or poppy seed filling, but WHY?)

The dark one is chocolate strawberry jam, as I finished the jar of caramel apple at the end.

The dark one is chocolate strawberry jam, as I finished the jar of caramel apple at the end.

The cookie part itself is just lightly sweet, and nicely crisp. You use an egg wash, both inside and out, which a) helps the cookie stay together, and b) gives it a nice shine on the outside. As you can see, none of mine fell apart/open while cooking, so I think the egg wash is worth the extra couple of seconds.

Bon Appétit cautions to make sure the dough has warmed back to room temperature before you fold it, to prevent cracking. I found that just by being rolled thin, the dough’s surface area gets so big that it very quickly warms up to room temp, and you shouldn’t need to be overly cautious.

Ingredients:

  • 1 1/2 teaspoons baking powder
  • 3/4 teaspoon kosher salt
  • 4 cups all-purpose flour, plus more for surface
  • 1 cup (2 sticks) unsalted butter, room temperature
  • 1 cup sugar
  • 3 large eggs
  • approximately 1 1/2 cups of your favorite flavored jam

IMG_6658Stir together the baking powder, salt, and flour in a medium bowl, then set aside.
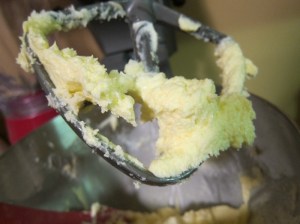
Beat together the butter and sugar on medium high speed until light and fluffy. Add two of the eggs, one at a time, beating after each.

IMG_6653Reduce the mixer speed to low and gradually add the dry ingredients until just combined.
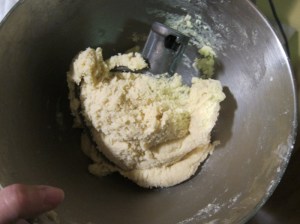
IMG_6654Split the dough in half, form into balls, then flatten into two 3/4″ thick disks. Wrap in plastic and refrigerate at least 2 hours, up to 2 days.
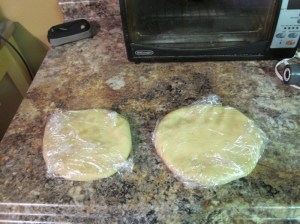
IMG_6655Arrange oven racks in top and bottom thirds of the oven. Line two (or more if you have them) baking sheets with parchment. Let 1 disk of dough sit at room temperature until slightly softened, about half an hour (I didn’t find it took that long). Depending on how fast your roll and assemble, you can preheat your oven to 350 now, or wait until you’re a bit closer to ready.

When you are ready to start rolling out the first disk of dough, you can take the second disk out of the fridge so it is ready when you get to it.

Roll out the first disk to 1/4″ thick on a very lightly floured surface. Using a 3 1/2″ cookie cutter, cut out circles and transfer them to your prepared sheets using a spatula. Re-roll the scraps as needed to use up the rest.

No cookie cutter? No problem!

No cookie cutter? No problem!

IMG_6657In a small bowl, beat the egg. Brush the edges of several of the dough circles, then place about 1 1/2 teaspoons of jam in the center. Don’t go too heavy, or they may not hold together well when baking. Fold up the edges into 3 sides and pinch into a triangle, leaving an opening over the filling, and being sure to pinch the corners so no jam oozes out while they cook. Brush the outside edges with egg wash. Repeat with remaining dough rounds.
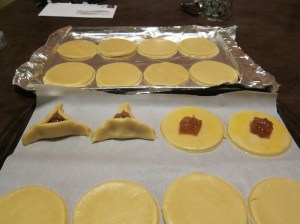
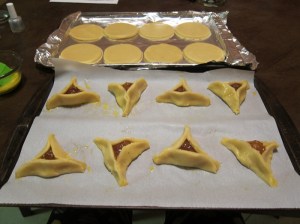
IMG_6660 IMG_6661When your two trays are ready, bake 18-22 minutes, rotating halfway through, until golden brown on the bottoms. While they cook, you can prepare the remaining disk of dough, if you have enough pans to place them on.

Let the cookies cool on the sheets. Although the jam stops bubbling quickly, remember it was just boiling moments ago, and can still wreck the inside of your mouth if you eat it immediately!

IMG_6662And there you go! All prepared for Purim (which is… in the spring?) or any time you find a good looking new jam!
Hamantashen

From Bon Appétit.

  • 1 1/2 teaspoons baking powder
  • 3/4 teaspoon kosher salt
  • 4 cups all-purpose flour, plus more for surface
  • 1 cup (2 sticks) unsalted butter, room temperature
  • 1 cup sugar
  • 3 large eggs
  • approximately 1 1/2 cups of your favorite flavored jam

Stir together the baking powder, salt, and flour in a medium bowl, then set aside.

Beat together the butter and sugar on medium high speed until light and fluffy. Add two of the eggs, one at a time, beating after each. Reduce the mixer speed to low and gradually add the dry ingredients until just combined.

Split the dough in half, form into balls, then flatten into two 3/4″ thick disks. Wrap in plastic and refrigerate at least 2 hours, up to 2 days.

Arrange oven racks in top and bottom thirds of the oven. Line two baking sheets with parchment. Let 1 disk of dough sit at room temperature until slightly softened, about half an hour. Preheat oven to 350 degrees.

When you are ready to start rolling out the first disk of dough, you can take the second disk out of the fridge so it is ready when you get to it.

Roll out the first disk to 1/4″ thick on a very lightly floured surface. Using a 3 1/2″ cookie cutter, cut out circles and transfer them to your prepared sheets using a spatula. Re-roll the scraps as needed to use up the rest.

In a small bowl, beat the egg. Brush the edges of several of the dough circles, then place about 1 1/2 teaspoons of jam in the center. Fold up the edges into 3 sides and pinch into a triangle, leaving an opening over the filling, and being sure to pinch the corners so no jam oozes out while they cook. Brush the outside edges with egg wash. Repeat with remaining dough rounds.

When your two trays are ready, bake 18-22 minutes, rotating halfway through, until golden brown on the bottoms. Repeat with second disk of dough.

Let the cookies cool on the sheets.


Posted in Dessert | Tagged , , , | 2 Comments

Berry Oatmeal Crisp (can be gluten-free)

This was the only new-to-me thing that I brought to Thanksgiving, and when I took it out of the oven, I was concerned that it was basically going to be sawdust-dry oats dumped on top of berries. I shouldn’t have worried – the top was actually perfect, with enough butter and a bit of moisture from the berries, to be fantastic!

Ingredients:

Berries:

  • 4 cups berries of choice, fresh or frozen
  • 2 tablespoons all-purpose flour/gluten-free flour blend
  • 1/4 cup sugar

Topping:

  • 2 cup (gluten-free) rolled oats
  • 1/3 cup brown sugar
  • 2 tablespoons all-purpose flour/gluten-free flour blend
  • 1 teaspoon cinnamon
  • 1/2 teaspoon salt
  • 1/4 cup cold butter, cut into chunks

Preheat oven to 375 degrees.

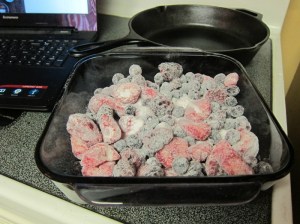
Combine the berries, flour, and sugar and stir together. Transfer into an 8×8″ pan or 9″ pie pan or cast iron skillet.

IMG_6629In a medium bowl, combine the oats, sugar, flour, cinnamon, and salt, stirring together. Add the butter and work in with your fingers or knives until well spread throughout the oat mixture. Sprinkle on top of the berries. It made a pretty thick coating, which is why I expected it to be dry.
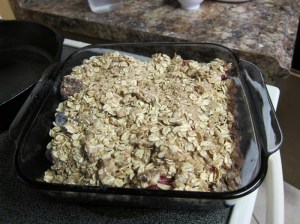
IMG_6630Bake, 25 minutes for fresh berries, 45 for frozen. Serve warm, with vanilla ice cream or whipped cream if you’ve got it!
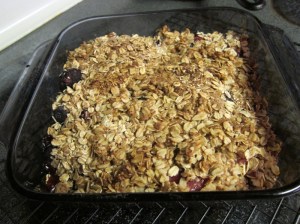
IMG_6631Unfortunately because I brought this to someone else’s Thanksgiving I didn’t really get a chance to take pictures of it being eaten, but I promise, everyone loved it!
Berry Oatmeal Crisp

From King Arthur Flour.

Berries:

  • 4 cups berries of choice, fresh or frozen
  • 2 tablespoons all-purpose flour/gluten-free flour blend
  • 1/4 cup sugar

Topping:

  • 2 cup (gluten-free) rolled oats
  • 1/3 cup brown sugar
  • 2 tablespoons all-purpose flour/gluten-free flour blend
  • 1 teaspoon cinnamon
  • 1/2 teaspoon salt
  • 1/4 cup cold butter, cut into chunks

Preheat oven to 375 degrees.

Combine the berries, flour, and sugar and stir together. Transfer into an 8×8″ pan or 9″ pie pan or cast iron skillet.

In a medium bowl, combine the oats, sugar, flour, cinnamon, and salt, stirring together. Add the butter and work in with your fingers or knives until well spread throughout the oat mixture. Sprinkle on top of the berries.

Bake, 25 minutes for fresh berries, 45 for frozen. Serve warm.

Posted in Dessert | Tagged , | 4 Comments

Pan Seared Pork Dumplings

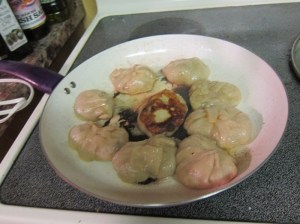
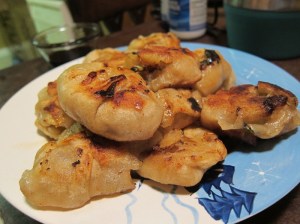
I must admit, these are some ugly dumplings. They are, however, delicious. It’s possible that if you are more dexterous, you could pull off both delicious and pretty looking. Dream the impossible dream!

IMG_6612Ingredients:

Filling:

  • 1 pound ground pork
  • 1/2 onion, chopped
  • 1 tablespoon ginger, minced
  • 50 milliliters (approx. 1.7 ounces) chicken stock
  • 1 tablespoon rice wine vinegar
  • 1 tablespoon light soy sauce
  • 1 tablespoon sesame oil
  • 1 tablespoon gochujang (optional, for a tiny bit of heat)
  • 1/2 teaspoon salt
  • 1/2 teaspoon pepper

Wrappers:

  • 2 cups all-purpose flour
  • 1/4 teaspoon salt
  • 100 milliliters (3 ounces) boiling water
  • 80 milliliters (2 1/2 ounces) cool water
  • 1 tablespoon vegetable oil
  • 3 tablespoons soy sauce
  • 1 1/2 tablespoons rice wine vinegar
  • minced ginger (optional)

Now, I ended up with some extra of the filling – you could maybe try adding half again to the wrapper mixture and making more, but I just cooked up the filling and added it to fried rice instead!

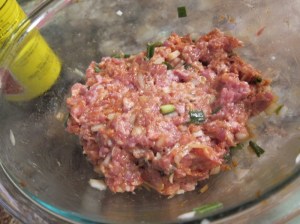
In a large bowl, combine the pork, onion, ginger, and chicken stock, mixing until the stock is all absorbed.

IMG_6599 Stir in  the rice wine vinegar, soy sauce, sesame oil, gochujang, salt, and pepper until well mixed. Cover, and place in the refrigerator.
IMG_6600In a medium bowl, combine the flour and salt, creating a well in the center. Pour the boiling water into the well, then stir with a wooden spoon until completely mixed. Add the cool water. Knead until the mixture forms a smooth, non-sticky dough. Cover with a damp cloth and let rest 20 minutes.
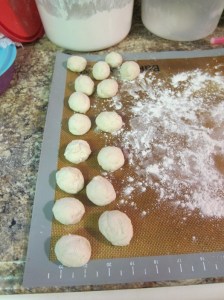
Divide the dough into 16 even portions and roll into balls. Cover, and let rest 10 minutes.

IMG_6603One at a time, roll the balls of dough out flat.

For a rough size-guide.

For a rough size-guide.

Place a tablespoon of the pork mixture in the center, and then fold the edges of the dough into the center. If you can make small, even, overlapping folds, you’ll end up with a better looking dumpling than mine.

IMG_6604 IMG_6606Gently press down on the dumpling to lightly thin/flatten. Repeat with the remaining dough balls.

IMG_6607Heat about half the oil in a pan over medium heat. Put 8 dumplings, or as many fit without touching, in the pan and cover. Cook 6-7 minutes, until browned on the bottom, then flip, re-cover, and continue to cook until browned on this side as well. Cook the remaining dumplings as well, in the remaining vegetable oil.

IMG_6609 IMG_6610Whisk together the soy sauce, vinegar, and ginger if using, as a dipping sauce, and serve.

So, silverware, huh?

So, silverware, huh?

Pan Seared Pork Dumplings

Adapted from Honey Bee Sweets.

Filling:

  • 1 pound ground pork
  • 1/2 onion, chopped
  • 1 tablespoon ginger, minced
  • 50 milliliters (approx. 1.7 ounces) chicken stock
  • 1 tablespoon rice wine vinegar
  • 1 tablespoon light soy sauce
  • 1 tablespoon sesame oil
  • 1 tablespoon gochujang (optional, for a tiny bit of heat)
  • 1/2 teaspoon salt
  • 1/2 teaspoon pepper

Wrappers:

  • 2 cups all-purpose flour
  • 1/4 teaspoon salt
  • 100 milliliters (3 ounces) boiling water
  • 80 milliliters (2 1/2 ounces) cool water
  • 1 tablespoon vegetable oil
  • 3 tablespoons soy sauce
  • 1 1/2 tablespoons rice wine vinegar
  • minced ginger (optional)

In a large bowl, combine the pork, onion, ginger, and chicken stock, mixing until the stock is all absorbed. Stir in  the rice wine vinegar, soy sauce, sesame oil, gochujang, salt, and pepper until well mixed. Cover, and place in the refrigerator.

In a medium bowl, combine the flour and salt, creating a well in the center. Pour the boiling water into the well, then stir with a wooden spoon until completely mixed. Add the cool water. Knead until the mixture forms a smooth, non-sticky dough. Cover with a damp cloth and let rest 20 minutes.

Divide the dough into 16 even portions and roll into balls. Cover, and let rest 10 minutes.

One at a time, roll the balls of dough out flat. Place a tablespoon of the pork mixture in the center, and then fold the edges of the dough into the center. Gently press down on the dumpling to lightly thin/flatten. Repeat with the remaining dough balls.

Heat about half the oil in a pan over medium heat. Put 8 dumplings, or as many fit without touching, in the pan and cover. Cook 6-7 minutes, until browned on the bottom, then flip, re-cover, and continue to cook until browned on this side as well. Cook the remaining dumplings in the remaining vegetable oil.

Whisk together the soy sauce, vinegar, and ginger if using, as a dipping sauce, and serve.


Posted in Dinner | Tagged , | Leave a comment

Skillet Cranberry Buckle

This is easy enough that it really shouldn’t throw off your already meticulously planned Thanksgiving cooking schedule too much if you (wisely) decide to throw it in! I made this twice last week, once for myself, and once to bring to work. I doubled the topping the second time, and everyone at work REALLY liked it. With the doubled topping, it sort of moves away from ‘scattered, but frequent, blobs of extra delicious’ to a full crust. My coworkers said they really liked that texture, combined with the light/soft cake underneath. I can’t believe I’m saying this, but I might actually have preferred it with just the ‘regular’ amount of topping? It let each bite be a bit different from the next, rather than a solid layer of unchanging topping. (To be fair, the topping is delicious, which is why I tried doubling it in the first place, so having too much of it is a pretty champagne problem!) One bag of cranberries is about enough to make this 3 times, so you might as well try it all sorts of ways and let me know what you think!

IMG_6624Ingredients:

Buckle:

  • 1/2 cup unsalted butter
  • 1 1/2 cups all-purpose flour
  • 2 teaspoons baking powder
  • 1/2 teaspoon salt
  • 3/4 cup granulated sugar
  • 1 large egg
  • 1 teaspoon vanilla
  • 1 cup milk
  • 1 cup cranberries

Topping (undoubled):

  • 1/4 cup packed light brown sugar
  • 2 tablespoons all-purpose flour
  • 2 tablespoons sliced almonds (I left those out. Yuck.)
  • pinch salt
  • 2 tablespoons unsalted butter, room temperature and cut into small cubes
  • powdered sugar, for garnish

Melt the butter in a 10″ cast iron skillet over medium-low heat. Once melted, pour the butter into a large heatproof bowl.

Preheat oven to 350 degrees.

Whisk together the flour, baking powder, and salt, and set aside.

Combine the topping ingredients in a small bowl and mix with a fork or hand, until well combined, with a texture similar to wet sand. Set aside.

IMG_6618Into the bowl the the butter, add the sugar, egg, and vanilla, stirring until well combined.

IMG_6619Add the flour  mixture in 3 portions, alternating with the milk in two additions. Stir until just combined, then pour into the skillet.

IMG_6620Scatter the cranberries over the batter, leaving about 1″ clear space around the edges.

IMG_6621Sprinkle the topping mixture over the batter.

regular/double

regular/double

Bake 35-40 minutes, until lightly browned and able to pass the toothpick test. Sprinkle with powdered sugar, then let sit for 10 minutes before serving.

afterThis is the perfect dessert-turned-tomorrow’s-breakfast cake!

Skillet Cranberry Buckle

From Go Bold With Butter.

Buckle:

  • 1/2 cup unsalted butter
  • 1 1/2 cups all-purpose flour
  • 2 teaspoons baking powder
  • 1/2 teaspoon salt
  • 3/4 cup granulated sugar
  • 1 large egg
  • 1 teaspoon vanilla
  • 1 cup milk
  • 1 cup cranberries

Topping (undoubled):

  • 1/4 cup packed light brown sugar
  • 2 tablespoons all-purpose flour
  • 2 tablespoons sliced almonds (I left those out. Yuck.)
  • pinch salt
  • 2 tablespoons unsalted butter, room temperature and cut into small cubes
  • powdered sugar, for garnish

Melt the butter in a 10″ cast iron skillet over medium-low heat. Once melted, pour the butter into a large heatproof bowl.

Preheat oven to 350 degrees.

Whisk together the flour, baking powder, and salt, and set aside.

Combine the topping ingredients in a small bowl and mix with a fork or hand, until well combined, with a texture similar to wet sand. Set aside.

Into the bowl the the butter, add the sugar, egg, and vanilla, stirring until well combined. Add the flour  mixture in 3 portions, alternating with the milk in two additions. Stir until just combined, then pour into the skillet. Scatter the cranberries over the batter, leaving about 1″ clear space around the edges.

Sprinkle the topping mixture over the batter. Bake 35-40 minutes, until lightly browned and able to pass the toothpick test. Sprinkle with powdered sugar, then let sit for 10 minutes before serving.


Posted in Brunch, Dessert | Tagged , , | Leave a comment

Kimchi Bulgogi Fries

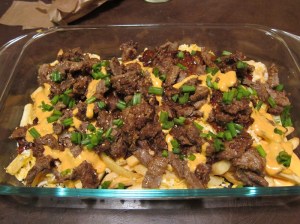
Last Wednesday we had off for Veteran’s Day, and, as there’s nothing else to do in town, I invited my coworker Kimberly over to cook. She’s been to South Korea/loves Korean food, so it was a no-brainer to try one of the many recipes I have bookmarked with kimchi somewhere in the name. This one actually was just called Kimchi Fries on the website I found it, but I feel like that doesn’t really do it justice, as the bulgogi ends up being more significant both in time to prepare and in volume. Well worth it, though, we both really liked this!

IMG_6597Ingredients:

Bulgogi:

  • 1/4 cup soy sauce
  • 1/8 cup sugar
  • 6 cloves garlic
  • 1 small onion
  • 1/2 small Asian pear
  • 1/4 cup water
  • 2 tablespoons sesame oil
  • 1/2 teaspoon black pepper
  • 1 pound rib eye or sirloin, thinly sliced
  • 2-3 tablespoons vegetable oil, for cooking

Caramelized Kimchi:

  • 1/4 cup sugar
  • 2 tablespoons gochujang (Korean chili pepper paste – if you’re extra sensitive to heat, use less, but while we found the warmth noticeable, it wasn’t overwhelming to either of us)
  • 2 tablespoons soy sauce
  • 1 cup kimchi, chopped and liquid retained
  • 1/2 onion

Everything Else:

  • 1/2 cup mayonnaise
  • 3 tablespoons Sriracha
  • 1 pound french fries (you can make yours from scratch, or check the freezer section)
  • grated cheddar or other cheese (we used jack for a bit more spice)
  • toasted sesame seeds
  • chopped green onion
  • sour cream (optional)

Using a food processor or blender, combine the beef marinade ingredients: the soy sauce, sugar, garlic, onion, Asian pear, water, sesame oil, and black pepper. Transfer the blended mixture to a large ziplock and add the sliced beef. Squeeze out the excess air, seal the bag, and rotate in all directions to thoroughly coat. Refrigerate at least 1 hour, up to overnight.

IMG_6586Preheat the oven and begin to cook the fries according to package (or recipe) instructions.
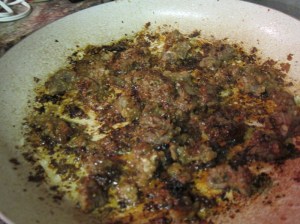
Once the beef has marinated, heat the vegetable oil in a pan over medium-high heat. Lay the meat in a single layer in the pan and cook several minutes on each side, until browned. You will probably need to do multiple batches to avoid crowding. When finished cooking the beef, you can clean out the pan before moving onto the next step, but…why bother? Everything’s all going to end up together soon enough… Set aside the cooked beef somewhere to stay warm.

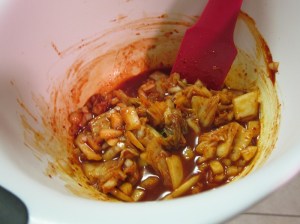
IMG_6587 IMG_6588 IMG_6589In a medium bowl, combine all the caramelized kimchi ingredients and stir together.

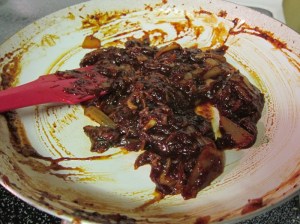
IMG_6590 Cook in the same pan over high heat, stirring frequently, until the mixture is thickened, and there isn’t liquid left to run across the pan as you stir it.

IMG_6591 IMG_6592In a small bowl, whisk together the mayonnaise and sriracha.

Transfer the cooked fries to a large serving platter. Top with the cheese, then the bulgogi and kimchi.

IMG_6593 IMG_6594Drizzle some of the sriracha mayo over the dish, then garnish with the sesame seeds and green onions. Add a dollop of sour cream, if desired. Serve with additional sriracha mayonnaise.

IMG_6596These will be best still hot from the oven/stove, but if you have leftovers, your best bet is to toast them back up in the toaster oven to minimize fry sogginess.

This is a bit of a mess, but it’s a mighty delicious one!

Kimchi Bulgogi Fries

From Notions and Notations of a Novice Cook.

Bulgogi:

  • 1/4 cup soy sauce
  • 1/8 cup sugar
  • 6 cloves garlic
  • 1 small onion
  • 1/2 small Asian pear
  • 1/4 cup water
  • 2 tablespoons sesame oil
  • 1/2 teaspoon black pepper
  • 1 pound rib eye or sirloin, thinly sliced
  • 2-3 tablespoons vegetable oil, for cooking

Caramelized Kimchi:

  • 1/4 cup sugar
  • 2 tablespoons gochujang (Korean chili pepper paste – if you’re extra sensitive to heat, use less, but while we found the warmth noticeable, it wasn’t overwhelming to either of us)
  • 2 tablespoons soy sauce
  • 1 cup kimchi, chopped and liquid retained
  • 1/2 onion

Everything Else:

  • 1/2 cup mayonnaise
  • 3 tablespoons Sriracha
  • 1 pound french fries (you can make yours from scratch, or check the freezer section)
  • grated cheddar or other cheese (we used jack for a bit more spice)
  • toasted sesame seeds
  • chopped green onion
  • sour cream (optional)

Using a food processor or blender, combine the beef marinade ingredients: the soy sauce, sugar, garlic, onion, Asian pear, water, sesame oil, and black pepper. Transfer the blended mixture to a large ziplock and add the sliced beef. Squeeze out the excess air, seal the bag, and rotate in all directions to thoroughly coat. Refrigerate at least 1 hour, up to overnight.

Preheat the oven and begin to cook the fries according to package (or recipe) instructions.

Once the beef has marinated, heat the vegetable oil in a pan over medium-high heat. Lay the meat in a single layer in the pan and cook several minutes on each side, until browned. You will probably need to do multiple batches to avoid crowding. Set aside the cooked beef somewhere warm.

In a medium bowl, combine all the caramelized kimchi ingredients and stir together. Cook in the same pan over high heat, stirring frequently, until the mixture is thickened, and there isn’t liquid left to run across the pan as you stir it.
In a small bowl, whisk together the mayonnaise and sriracha.

Transfer the cooked fries to a large serving platter. Top with the cheese, then the bulgogi and kimchi. Drizzle some of the sriracha mayo over the dish, then garnish with the sesame seeds and green onions. Add a dollop of sour cream, if desired. Serve with additional sriracha mayonnaise.
Posted in Dinner, Party! | Tagged , , | 1 Comment

Apple Chicken Couscous

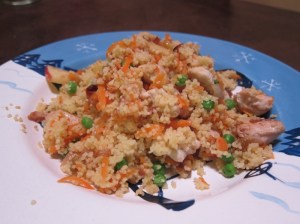
Sometimes I find a recipe that sounds almost like what I’m in the mood for, but with some ingredient that is just ruining everything. That’s about where I was at when I changed things up/combined the idea of a few recipes to make this. This is tasty, and each bite has a variety of textures and flavors that make you keep taking “just one more” bite!

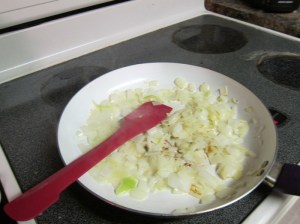
IMG_6585While I am often lax about mise en place (getting everything measured out and/or chopped up before you start actually cooking), once this recipe really gets rolling, things go pretty fast, so it’s best if you do get most things set out ahead of time.
Ingredients:

  • 2 tablespoons unsalted butter
  • 1 medium onion, chopped
  • 16 ounces chicken breast, chopped
  • 1 1/2 cups chicken stock
  • 1 cup dry couscous
  • 1/2 cup frozen peas
  • 1 large carrot, shredded
  • 1/2 cup golden raisins
  • 1 very large apple, chopped

Melt the butter in a pan over medium heat. Add the chopped onion and cook until the onion has softened, stirring occasionally.

IMG_6580Add the chicken and continue to cook until the chicken is cooked through.
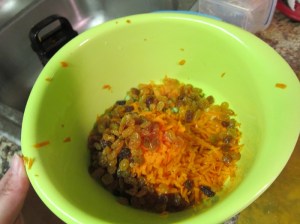
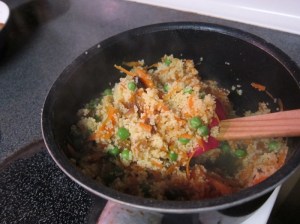
Meanwhile, bring the chicken stock to a boil. Combine the couscous, peas, carrot, and raisins, then add to the stock. Cover, and let cook 2-3 minutes, until all the liquid has been absorbed. Remove from heat and fluff with a fork.

IMG_6581

Needs another minute - still some liquid hiding in the bottom.

Needs another minute – still some liquid hiding in the bottom.

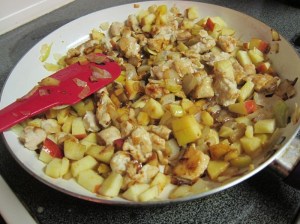
When the chicken is cooked through, add the apple to the chicken and onion mixture, and let cook until beginning to soften.

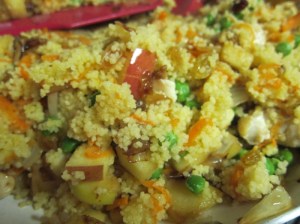
IMG_6583Stir the couscous mixture into the chicken mixture, and serve.

IMG_6584I quite enjoyed this! It’s got some sweetness from the fruit, and enough fruits and vegetables that it feels decently healthy, plus it all goes pretty fast once the onions have softened. I’d eat it again!

Apple Chicken Couscous

  • 2 tablespoons unsalted butter
  • 1 medium onion, chopped
  • 16 ounces chicken breast, chopped
  • 1 1/2 cups chicken stock
  • 1 cup dry couscous
  • 1/2 cup frozen peas
  • 1 large carrot, shredded
  • 1/2 cup golden raisins
  • 1 very large apple, chopped

Melt the butter in a pan over medium heat. Add the chopped onion and cook until the onion has softened, stirring occasionally. Add the chicken and continue to cook until the chicken is cooked through.
Meanwhile, bring the chicken stock to a boil. Combine the couscous, peas, carrot, and raisins, then add to the stock. Cover, and let cook 2-3 minutes, until all the liquid has been absorbed. Remove from heat and fluff with a fork.

When the chicken is cooked through, add the apple to the chicken and onion mixture, and let cook until beginning to soften. Stir the couscous mixture into the chicken mixture, and serve.
 

Posted in Dinner, Picnic | Tagged , | Leave a comment

Macaroni Pizza

Another recipe from a cookbook at my museum. This one was called Sharing Recipes, A Book of Favorite Recipes, put together by the Ladies Auxiliary of the WY VFW.

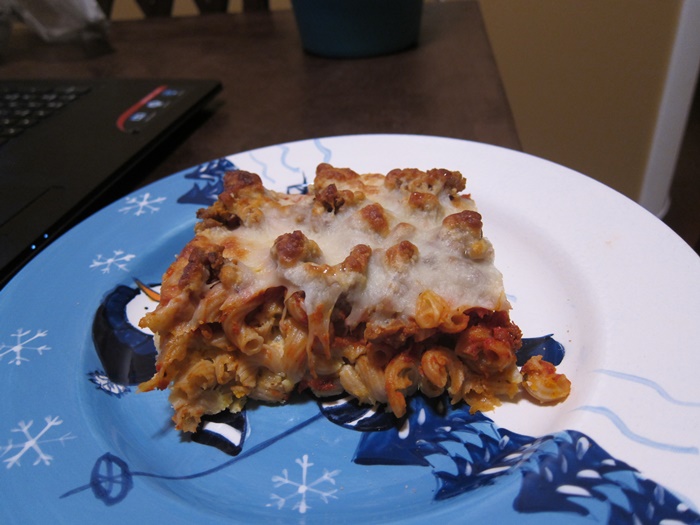
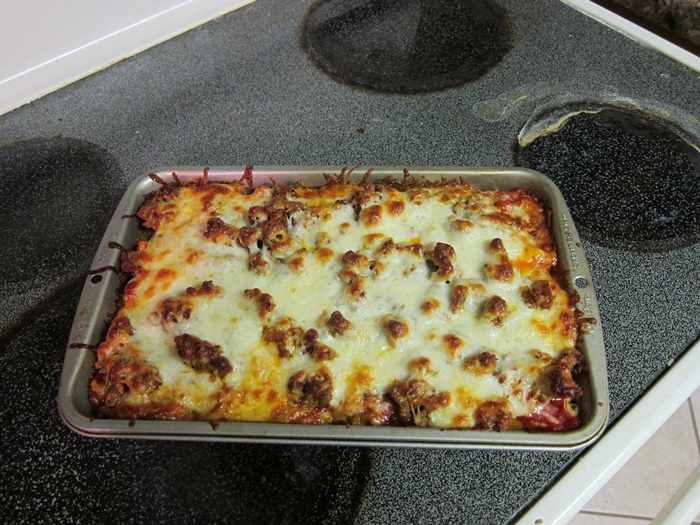
IMG_6578Like most combos of sauce, cheese, and pasta, it’s tasty, and maybe a bit fun because it’s different.

Ingredients:

  • 7 ounces elbow pasta
  • 2 eggs
  • 1 1/4 cups milk
  • pinch black pepper
  • 8 ounces pasta sauce
  • 1 1/2 pounds Italian sausage, cooked (optional)
  • 1 1/2 cups shredded Mozzarella cheese

Preheat your oven to 400 degrees. Grease a 9X9″ pan. (if you don’t have one, 7×11″ worked fine for me!)

Cook the pasta according to package instructions. Meanwhile, whisk together the eggs, milk, and pepper.

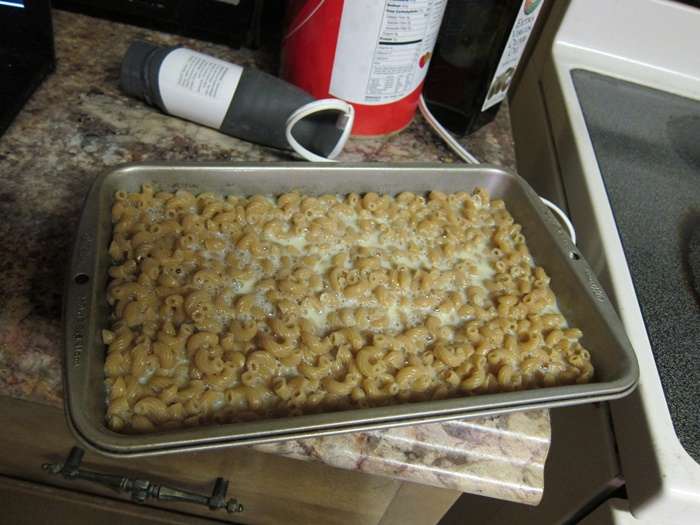
IMG_6567When the pasta is cooked, drain and stir into the egg mixture. Transfer to the prepared pan, and bake 10 minutes.

IMG_6569 IMG_6570Spread the pasta sauce over the pasta.

IMG_6572I was worried at this step that the pasta was still way too liquidy, and it was going to turn out gross, but never fear, it firms up! Spread the sausage over the pasta sauce, then top with cheese.

IMG_6573 IMG_6574Bake a further 10-15 minutes, until the cheese has lightly browned.

IMG_6576

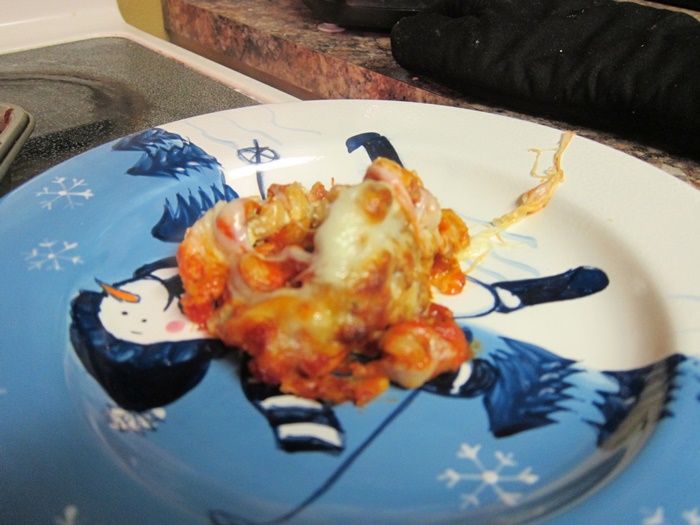
This is what you get trying to scoop it hot.

You can get nice edges with your refrigerated leftovers.

You can get nice edges with your refrigerated leftovers.

Macaroni Pizza

From Sharing Recipes, A Book of Favorite Recipes.

  • 7 ounces elbow pasta
  • 2 eggs
  • 1 1/4 cups milk
  • pinch black pepper
  • 8 ounces pasta sauce
  • 1 1/2 pounds Italian sausage, cooked (optional)
  • 1 1/2 cups shredded Mozzarella cheese

Preheat your oven to 400 degrees. Grease a 9X9″ pan. (if you don’t have one, 7×11″ worked fine for me!)

Cook the pasta according to package instructions. Meanwhile, whisk together the eggs, milk, and pepper. When the pasta is cooked, drain and stir into the egg mixture. Transfer to the prepared pan, and bake 10 minutes.

Spread the pasta sauce over the pasta. I was worried at this step that the pasta was still way too liquidy, and it was going to turn out gross, but never fear, it firms up! Spread the sausage over the pasta sauce, then top with cheese. Bake a further 10-15 minutes, until the cheese has lightly browned.

Posted in Dinner | Tagged , , , | Leave a comment