
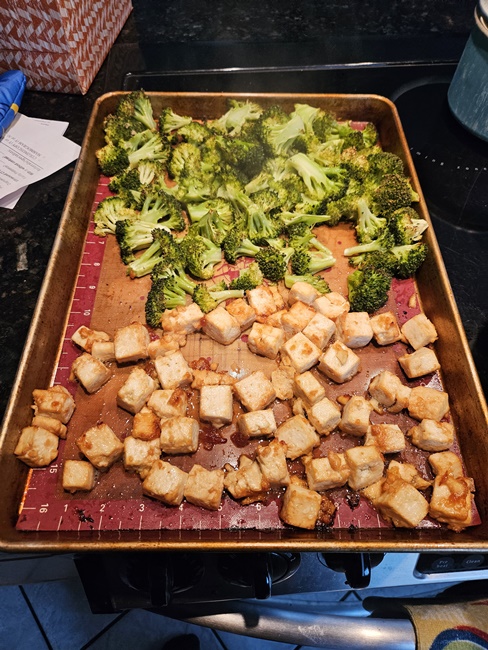
First things first – I have to admit, this is supposed to be Crispy Baked Tofu with Broccoli, but it hasn’t come out crispy the few times I’ve made it. It has, however, been tasty enough to keep making multiple times, so… okay. I have been doubling the amount of broccoli (which is how I wrote it below), which feels like the right proportions to me. The sauce is really easy, but also really goods, so I do recommend giving it a go! You can sub in tamari for the soy and agave for the honey to get a gf/vegan meal if that is relevant to your interest.
Ingredients:
Tofu:
- 1 block extra firm tofu
- 1 tablespoon cornstarch
- 1 1/2 tablespoons extra virgin olive oil
- 1 tablespoon soy sauce
- 1 tablespoon honey
Broccoli:
- 2 crowns broccoli cut into bite-size florets
- 1 tablespoon extra virgin olive oil
- 1 clove garlic, minced
- 1 teaspoon kosher salt
Sauce:
- 1/4 cup soy sauce
- 1 tablespoon toasted sesame oil
- 2 tablespoons water
- 2 tablespoons seasoned rice vinegar
- 1 tablespoon cornstarch
- 2 tablespoons packed light brown sugar
- 1 clove garlic, minced
For Serving:
- sesame seeds
- sliced green onions
- cooked rice/other grain
At least 30 minutes before cooking (at lunch, if you work from home, works), drain the liquid from the tofu package, then wrap the block of tofu in several layers of paper towel. Plate on a plate, with another plate upside-down on top, and layer something on top to create a gentle weight. Keep in the fridge until ready to cook.
 Preheat oven to 400. Line a large baking sheet with foil or parchment, and spray with baking spray if using foil.
Slice the tofu into 1″ cubes, and put in a medium bowl. Toss gently with the cornstarch.
 In a small dish, stir together the olive oil, soy sauce, and honey. Pour over the tofu and again toss gently.
 Spread in a single layer over part of the baking sheet.
In a large bowl, stir together the broccoli, oil, garlic, and salt.

Ok clearly this is a ziplock not a bowl.
Spread the broccoli over the rest of the baking sheet.
 Bake for 30-35 minutes, tossing halfway through.
 Meanwhile, combine the soy sauce, sesame oil, water, and vinegar in a small saucepan and stir together. Place the cornstarch in a small dish and pour 2-3 tablespoons of the sauce mixture into it, stirring until the cornstarch is all mixed in. Pour the cornstarch mixture back into the pot and add the brown sugar and garlic. Put over medium heat and whisk until the sauce has thickened.
 Serve the tofu and broccoli over rice with a drizzle of sauce.

Tofu and Broccoli
A bit adapted from Savory Simple.
Tofu:
- 1 block extra firm tofu
- 1 tablespoon cornstarch
- 1 1/2 tablespoons extra virgin olive oil
- 1 tablespoon soy sauce
- 1 tablespoon honey
Broccoli:
- 2 crowns broccoli cut into bite-size florets
- 1 tablespoon extra virgin olive oil
- 1 clove garlic, minced
- 1 teaspoon kosher salt
Sauce:
- 1/4 cup soy sauce
- 1 tablespoon toasted sesame oil
- 2 tablespoons water
- 2 tablespoons seasoned rice vinegar
- 1 tablespoon cornstarch
- 2 tablespoons packed light brown sugar
- 1 clove garlic, minced
For Serving:
- sesame seeds
- sliced green onions
- cooked rice/other grain
At least 30 minutes before cooking (at lunch, if you work from home, works), drain the liquid from the tofu package, then wrap the block of tofu in several layers of paper towel. Plate on a plate, with another plate upside-down on top, and layer something on top to create a gentle weight. Keep in the fridge until ready to cook.
Preheat oven to 400. Line a large baking sheet with foil or parchment, and spray with baking spray if using foil.
Slice the tofu into 1″ cubes, and put in a medium bowl. Toss gently with the cornstarch. In a small dish, stir together the olive oil, soy sauce, and honey. Pour over the tofu and again toss gently. Spread in a single layer over part of the baking sheet.
In a large bowl, stir together the broccoli, oil, garlic, and salt, then spread over the rest of the baking sheet. Bake for 30-35 minutes, tossing halfway through.
Meanwhile, combine the soy sauce, sesame oil, water, and vinegar in a small saucepan and stir together. Place the cornstarch in a small dish and pour 2-3 tablespoons of the sauce mixture into it, stirring until the cornstarch is all mixed in. Pour the cornstarch mixture back into the pot and add the brown sugar and garlic. Put over medium heat and whisk until the sauce has thickened.
Serve the tofu and broccoli over rice with a drizzle of sauce.
 These are pretty intense looking, but were very doable in a day during which I did a whole lotta other stuff, especially because I had multiple bags of caramel bits already so skipped making that layer from scratch. I’ve gotten good response sharing with a few friends! The original recipe said use an 8″ or 9″ square pan and I used an 8″, since my 9″ pan still had leftover
  Combine the crumbs and melted butter in a medium bowl and stir together. Pour into the lined 9×9″ pan and spread evenly, pressing firmly into the bottom of the pan. Bake for 10 minutes, then set aside to cool.
 When the crust has cooled, combine the caramel bits and water in a microwave-safe dish and microwave for 2 minutes.
 Stir until smooth, then pour over the crust. Set aside.
 In a small dish, combine 1/3 cup water, the vanilla, and gelatin and stir until no dry clumps remain. Set aside.
 In a deep pot, combine the the water, honey, brown sugar, and salt. Put over medium heat and stir to combine.
 Heat until a thermometer in the mixture reaches 245-250.
 Remove from the heat and pour into the bowl of a stand mixer.
 Let cool for a quick minute, then add the now-congealed gelatin.
 Beat with the whisk attachment, starting on low speak and working up to medium, and beating for around 10 minutes.
 While the gelatin mixture is beating, heat the chocolate in the microwave in 30 second bursts, stirring after each, until melted and smooth. Set aside to cool slightly.
 If your caramel layer is room temperature and the caramel isn’t sticky at all, throw it back in the oven for just a few minutes, just long enough to soften the caramel a bit to help it stick to the marshmallow. Spread the marshmallow onto the caramel layer, and spread evenly. Let set for at least 4 hours.
 To cut, run a sharp knife under hot water until the blade is hot, then wipe the blade dry. Spray with some cooking grease, and slice. To store, put in an airtight container in the fridge, but bring back to room temp for cutting/eating.

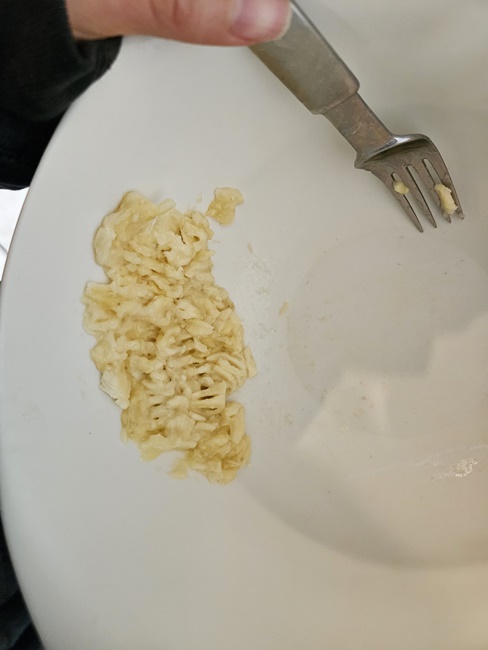
 In a large bowl, mash the banana until smooth.
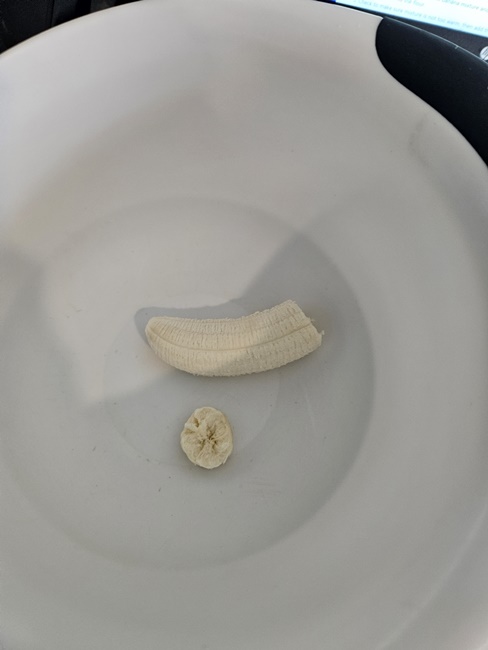
 Stir in the chocolate mixture, followed by the salt and flour.
 Check that the batter isn’t still so warm that it would melt your chocolate chips, and if it’s cool enough, stir them in. (Otherwise, wait a few minutes until it has cooled.) Transfer the batter to your lined 9×9″ dish.
 In a small dish, mix together the peanut butter and oil.
 Drop spoonfuls over the batter, then drag a knife through the batter to marble the peanut butter in. In my cold house, on the cold marble counter, the chocolate in the batter had already firmed back up enough that it was quite firm and resistant to ‘marbling’.
 Bake for 30 minutes, or until they appear set. While the peanut butter bakes, it gets little air holes in it, so if that’s going to bother you, drop small spoonfuls of additional peanut butter on the still-hot brownies, and it’ll melt into the holes in the existing peanut butter.
 Let cool to room temperature, then chill for at least 2 hours. Remove from the pan and cut into squares, and enjoy.
 Ingredients:

 After the 7 hours, remove the bay leaf and discard. Remove the chicken onto a plate and shred, then return to the crock pot.
 Stir in the chicken, and the cilantro if using. Serve with tortilla chips.

 Microwave your peanut butter for 30 seconds to make it more pourable, then spread evenly over the top of the slices.
 Move the pan into your freezer while you microwave the chocolate in 30 second bursts, stirring after each, to melt the chocolate. Once the chocolate is melted and smooth, take the pan back out and spread the chocolate evenly on top of the peanut butter-ed bananas.
 Freeze for an hour, then either slice with a sharp knife, or break off individual banana slices as you snack. Easy peasy!

 Ingredients:
 Beat in the egg and vanilla.
 In a medium bowl, whisk together the flour, milk powder, and baking powder.
 Beat the dry goods into the cream cheese mixture in several additions. Refrigerate the dough at least 30 minutes. Meanwhile, preheat the oven to 350 degrees.

 Bake until light brown, 10-12 minutes.
 Let cool briefly, then transfer to a wire rack to cool. It took me long enough to roll the dough balls that it made sense to just put one pan in the oven at a time and work on the other. I ended up with about 3 1/2 pans’ worth.


 Bring to a boil, and continue to cook at a low boil for 20 minutes, stirring occasionally. It’s honestly ok to get the first 4 ingredients in and heating while you chop the apples as long as you take a break from chopping to stir once in a while.
 While the caramel apple mixture boils, combine the dry goods from the dumplings in a small bowl, and the liquids in a measuring cup.
 Stir together until no dry bits still exist.
 Spoon big spoonfuls of batter into the boiling caramel apple mixture, trying to space them out evenly.
 Cover the pot, reduce the heat to medium-low, and simmer for 15 minutes. After that, the surface of the dumplings may look wet, but that’s probably just external mixture, they should be cooked through.
 Scoop, and serve with some vanilla ice cream!
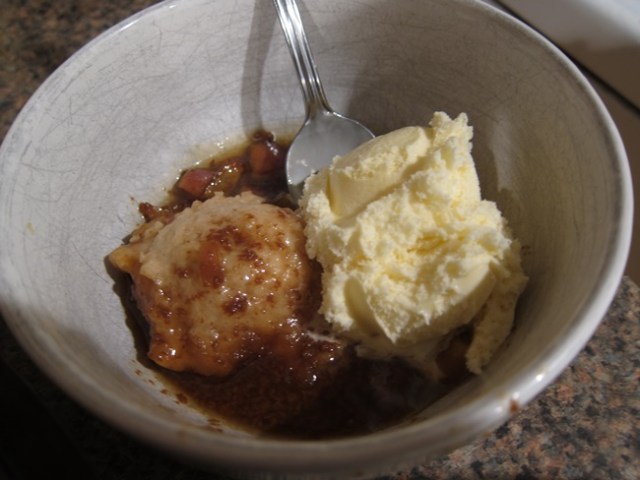
 When ready to cook, drain the beans, then combine with the broth and 4 cups water over high heat. Bring to a boil, then reduce the heat and simmer until tender, at least 45 minutes.
 Meanwhile, in a large, heavy-bottomed pot, heat the oil over medium heat. Add the onion and herbs and cook until tender, about 10 minutes.
 Stir in the squash and cook for 5 minutes.
 Drain the cooked beans, reserving the liquid, and pour 6 cups (after evaporation, that’s most of it) into the pot with the squash.
 Cook at a simmer until the squash starts to become tender. Add the beans and continue cooking until the squash is very soft.
 Season with salt if needed. Remove the bay leaf before serving.
 Ingredients:

 Scrape down the sides of the bowl, then add the sugar and beat another 2 minutes on high before scraping down the sides again.
 Reduce the mixer’s speed to medium and add the vanilla. Add the eggs one at a time, scraping down the bowl again.
 Add half of the flour mixture, and beat in on low speed. Add half the strawberry/milk mixture, and beat until about combined, then repeat with the remainder of the flour mixture and strawberry mixture, beating until just combined.
 Transfer the batter to the prepared pan.
 Bake 55-60 minutes, or until the cake passes the toothpick test, and/or springs back when pressed with a finger.
 Let cool for 5 minutes in the pan, then turn out onto a wire rack to cool completely.
 Add the vanilla and lemon juice and beat until just incorporated. Add the powdered sugar and salt and beat on low until completely incorporated, scraping down the sides/bottom of the bowl at least once.
 Spread on the completely cooled cake, and enjoy.

 In a medium bowl, whisk together the remaining 7 tablespoons of butter with the sugar, egg, salt, cinnamon, and vanilla by hand.
 Swap to a rubber spatula and stir in the baking soda, then the flour. Refrigerate 15-20 minutes, until still soft but less sticky.
 Preheat oven to 350 degrees. Line two baking sheets with parchment/silpats.
 Gently swirl the gochujang mixture into the dough, using just a handful of swipes to create streaks through the dough, rather than stirring so much that it becomes evenly distributed.
 Use an ice cream scoop to create 1/4 cup balls of dough, and space widely on your prepared pans, putting only 4-5 dough balls per pan.
 Bake 11-13 minutes, rotating halfway through, until golden at the edges and almost set in the center. Cookies will firm up as they cool on the pan. Store in an airtight container, and enjoy within the next few days.
